Spruce Up Your Home for Spring

Spruce Up Your Home for Spring

Even though winter is an abbreviated season in Florida, there is still a great deal of enthusiasm for the start of spring! Longer days mean more time to enjoy the abundant sunshine, reminding us of why we love living in Central Florida. So, of course, we want to bring brightness and color to our home, as well! We at The Paint Manager welcome spring, and offer some tips on how to spruce up your home – both inside and out – to make the most of this season of new beginnings!

Welcome the New Season with a New Look

Spring provides the perfect excuse to buy new accessories and accent furniture pieces to add pizazz without making a big, expensive investment. If you’ve been careful about venturing far outside your “bubble” this past year, many of these items can be ordered online to give your home – and your spirits – a lift! Here are some ideas provided by the décor pros at The Spruce, Style Blueprint and Houzz (via Forbes).

Interior Décor Tips

Add glass, acrylic or Lucite accessories to give your rooms a light, airy look. Table lamps, vases, bowls, small accent tables, tabletops and chairs of these materials have the additional advantage of making small rooms appear larger. Furniture items are more likely to be fashioned of acrylic or Lucite, which is the brand name for a premium-quality acrylic material.

Change out your throw pillows. If you still have the pillows that came with your sofa, it’s probably time for a new look, anyway! They’re a great way to introduce new colors and textures, which open possibilities for other accessories – such as table lamps – to pick up colors in this expanded palette. Interior décor professional Lauren Flanagan shares her knowledge about how to choose the perfect throw pillow in her article for The Spruce. On a tight budget? New throw pillow covers can do the job just as well!

While we may be getting ahead of ourselves, refreshing Florida room and patio furniture with new pillows and cushions is also guaranteed to give these areas a pick-me-up that will make them a more relaxing place to unwind!

Buy new lamps. An easy and relatively inexpensive way to literally brighten your interior décor is to purchase table and/or floor lamps. You can go for a contemporary style with clean lines, tropical island or transitional – the choice is yours! New lamp shades can also provide a fresh look.

Use baskets to organize. Using baskets provides two benefits at once: They are decorative elements in their own right, plus they offer neat storage for a wide variety of items. HGTV contributing writer Allie Holcomb King shares her ideas (with photos) for solutions that are both attractive and practical!

Rearrange your artwork, or buy new pictures. Create a gallery on a stairway wall, in a foyer or any wall that can accommodate it. You don’t need a big budget to buy art! Flea markets, antiques shops and yard sales are all good sources of framed art, as are national chain stores that specialize in home accessories and craft supplies. The latter two types of establishments offer online shopping, which gives you the advantage of seeing the art on the website and ordering it without having to visit the store.

Change the knobs on your drawers and cabinets. This is one of the easiest things you can do to give your furniture or kitchen cabinets a fresh look! However, make certain the new knobs will fit.

Buy a new shower curtain. Although a shower curtain is typically the most noticeable element of a bathroom, it’s too often treated as an afterthought. Take the opportunity to make a design statement with it – and create the illusion that you’ve updated your entire bathroom!

Paint furniture and small accessories. The great part about this tip is that you don’t have to buy anything other than the paint and paintbrush (and maybe a paint tray and sandpaper)! It’s perfect for bringing new life to old pieces that have faded into the background or just look a little tired. Painting larger items like a dresser will require more elbow grease and paint supplies than a basic chair or wood table lamp, but the effect will pay off! Get creative with color, finishes and effects – such as stenciling.

Because we at The Paint Manager always put safety first, be sure that the room in which you paint is well-ventilated and free of potential hazards. Follow label instructions for all products, and wear protective gear if using spray paint (which should only be done outdoors). The good people at Krylon provide this comprehensive list of spray paint safety tips.

Paint an accent wall. Feeling a little more ambitious? Make one wall of your living or dining room an accent wall by painting it in an attention-getting (but complimentary) color. According to interior design and color consultant Diana Hathaway Timmons in her article for The Spruce, “Accent walls are alive and well in the decorating industry. These easy and stylish color accents will always be popular because of their flexibility. You have unlimited paint options for your accent wall, as well as other surfaces and materials. Even the location of your accent wall is purely personal. Your home is unique, so your accent wall should be just as special.”

Again, be sure you have proper ventilation and take all safety precautions – as well as invest in the right ladder for the job! Don’t try to improvise with a step stool or – even worse – a chair. Keep children and pets out of the room while you’re working.

Refresh Your Yard and Patio

Just as with our interior décor tips, there are many inexpensive ways to refresh your outdoor area! Changing out patio chair and lounge cushions are a good start, and often necessary in Florida, where high humidity encourages mold and mildew growth. It may also be time for a new patio table umbrella. If your patio furniture is showing its age, repaint it! Just follow the precautions we noted earlier, and follow label instructions for any product you use. 

Buy container plants. Bright, flowering annuals in decorative pots can brighten up any area of the patio or front exterior that you want. Choose planters that complement your home’s architectural style and color, and – depending upon the color of your thumb – plants that are easy to care for. Garden enthusiasts will be willing to spend more time caring for higher-maintenance plants than those who just want a pop of color on their front porch or by the pool. Buy plants of varying heights and group together for additional visual interest.

Add landscape lighting. Given the variety of solar-powered landscape lights available at all price points, investing in lights to define pathways and plant beds need not be expensive. Our blog post – “Path Lighting Ideas for Safety and Beauty” – covers this topic in detail.

Add decorative lighting. Our blog post – “How to Use Outdoor Lighting as a Home Improvement” – provides plenty of ideas, such as using string lighting. Positioned at regular intervals, overhead string lighting can illuminate your courtyard. Or use café lights in a string formation. Lanterns also provide evening charm!

Consider a water feature – Adding a water feature (fountain) in your garden or patio can make your surroundings calm and serene, as well as creating an intriguing visual accent. Fountains are available in a variety of styles – from minimalist to traditional – at a price point for every budget. A self-contained fountain is typically less expensive and easier to install than one with a reservoir and pump, which requires a plumber to install.

Make Your Home Your Haven Throughout the Year

We hope our ideas help inspire you to bring more joy into your home and into your life! When you need home repairs or maintenance, The Paint Manager is here! At the present time, our professional contractors are only available for exterior jobs. Of course, we will let our valued members know when we are again able to provide our full range of services. As always, we appreciate your support! Feel free to contact us to schedule an appointment or ask questions, and stay safe!

Preventing Slip-and-Fall Accidents

Preventing Slip-and-Fall Accidents

If you read our blog on a regular basis, you’ve perhaps noticed the emphasis that we at The Paint Manager place on safety. While we usually feature home improvement topics in this space, we’re devoting this month’s blog post to preventing what the National Floor Safety Institute (NFSI) identifies as the cause of half of all accidental deaths in the home, and the leading cause of workers’ compensation claims – slip-and-fall accidents.

Although such accidents are usually known as “slip-and-fall,” tripping is included. Trips occur when your foot hits an object and you are moving with enough momentum to be thrown off balance. Both slips and trips cause you to fall.

Our team of home improvement professionals practice “safety first” at all times. We want you to be aware of how to be safe at home and at work, and make it a way of life!


Don’t be One of These Statistics

NFSI and the Centers for Disease Control and Prevention (CDC) provide the following disturbing statistics about slip-and-fall accidents.


Home slip-and-fall accidents:

  • One out of five falls causes a serious injury such as broken bones or a head injury.
  • Falls are the most common cause of traumatic brain injuries (TBI).
  • Half of all accidental deaths in the home are caused by a fall. Most fall injuries in the home happen at ground level, not from an elevation.
  • Each year, 3 million older people are treated in emergency departments for fall injuries.
  • Over 800,000 patients a year are hospitalized because of a fall injury, most often because of a head injury or hip fracture.


Workplace slip-and-fall accidents:

  • Fall fatalities are nearly equally divided between men and women. However, more women will experience a slip-and-fall accident. According to the Bureau of Labor Statistics, falls accounted for 5% of the job-related fatalities for women compared to 11% for men.
  • Slips and falls do not constitute a primary cause of fatal occupational injuries, but represent the primary cause of lost days from work.
  • Slips and falls are the leading cause of workers’ compensation claims and are the leading cause of occupational injury for people aged 55 years and older. 


Who is at Risk?

People ages 65 and up are at greatest risk for slip-and-fall accidents, as well as those who work in an industrial setting. According to Verywell Health, those with arthritis, osteoporosis and mobility problems are particularly susceptible. As we will cover later, people of all ages and occupations can be susceptible to injury from these causes if they perform outdoor home maintenance or yard tasks without the proper equipment, protective gear or know-how.


Preventing Slip-and-Fall Accidents at Home

Verywell Health provides a comprehensive list of hazards in every room of the home, and how to prevent them. We recommend that you bookmark this linked page or print it out for easy reference. Some of the highlights follow:


Living room:

  • Clear clutter off the floor (pick up newspapers, books, shoes, toys, magazines, etc.).
  • Use care around low furniture (coffee tables, ottomans, etc.).
  • Anchor loose telephone, computer and electrical cords.
  • Secure or avoid area throw rugs.
  • Repair bulges in carpeting.
  • Take extra care with changes in the floor surface (such as when carpet meets tile floors).


Kitchen:

  • Wipe up spills immediately.
  • Use a sturdy step stool (not a chair) to reach top cabinets.
  • Use a non-skid rug in front of the sink.
  • Do not over-wax or over-polish floors.


Bathroom:

  • If you have issues with balance or mobility, install grab bars by the toilet, shower and tub. Towel racks, soap dishes, etc., are not designed to hold a person’s weight.
  • Use a shower chair and handheld showerhead if prone to falling.
  • Use extra care around soapy water.
  • Use non-skid bath mats by the shower and sink.
  • Use rubber mats or slip-resistant stickers in the tub.
  • Quickly clean up puddles.


Bedroom:

  • Keep shoes, clothing and other items off the floor.
  • If you have issues with balance or dizziness, sit upright at the edge of the bed for a minute or two before getting up to prevent falling.


Stairs and steps:

  • Always keep steps and staircases clear.
  • Keep stairwells well-lit.
  • Install sturdy handrails on both sides.
  • Add non-slip safety treads to steps.
  • Always keep one hand free to be able to use the handrail.
  • Never carry items that obstruct your view of the next step.
  • Don’t overload yourself. Carry smaller, lighter loads and/or make extra trips.
  • Take your time to decrease chances of misjudging a step.


Garage:

  • Clean up oily areas on the floor.
  • Keep items organized and out of the way.
  • Use a ladder to reach items stored on high shelves. See our section on outdoor slip-and-fall hazards for a link to a helpful guide on choosing the right ladder for any household task.


Watch Out for Outdoor Slip-and-Fall Hazards

Regardless of one’s age or occupation, performing outdoor chores or DIY projects pose a particular risk. If you don’t perform such tasks as cleaning gutters on a regular basis, you may not have the proper equipment that would allow you to do so safely. Many people have ladders that aren’t sturdy or appropriate for the job – or improvise with something unstable, such as a patio chair or stool. The Spruce has an excellent article on how to choose (and use) the right ladder for the task at hand. If you even occasionally use a ladder outdoors or indoors, it is well worth a few minutes of your time to read!

Even doing simple yard work can result in a slip-and-fall injury. Tripping hazards – such as an unseen branch on the ground in your path – or a slick patch of grass after a rainfall – can be enough to get you off-balance. So can wearing flip-flops, which don’t provide the necessary stability on uneven ground or slick surfaces (such as wet grass), or protection against injury. And don’t text or talk while walking! Find a place to stand or sit while you communicate on your phone. That old advice from your mom – keep your eyes open and watch where you’re going – is still important!

Yet, no matter how good your equipment or how vigilant you are, age remains a factor. When you’re deciding whether to take on a DIY project with an element of risk or hire a pro, be honest with yourself. Physical tasks that were perhaps easy for you to perform 20 years ago may be more challenging today. It isn’t worth trying to prove something to yourself if you wind up in the hospital – or worse. Enjoying a healthy, independent life is far preferable.


Preventing Slip-and Fall Accidents in the Workplace

Hopefully, your company follows all OSHA (Occupational Safety and Health Administration) regulations. But even those that enforce the strictest compliance can only do so much to prevent human error and negligence. Ultimately, being safe in the workplace is your responsibility.

The most basic safety measure is to be alert! Keep your head up and avoid distractions, such as texting or other cell phone use. Being aware of your surroundings to avoid hazardous situations is one of the best ways to prevent any type of accident.

The Timber Manufacturers Association provides the following precautions to prevent slip-and-fall accidents.


Slips:

  • Practice safe walking skills.
  • Take short steps on slippery surfaces and point your feet slightly outward.
  • Clean up or report spills immediately.
  • Don’t let grease accumulate on floors.


Trips:

  • Make sure you can see where you’re walking.
  • Don’t carry loads that you can’t see over.
  • Keep the workplace clean and tidy.
  • Properly maintain walking areas and report potential maintenance-related hazards.


Falls:

  • Don’t jump off landings or loading docks – use the stairs.
  • Repair or replace stairs or handrails that are loose or broken.
  • Keep passageways and aisles clear of clutter, and well-lit.
  • Wear shoes with the appropriate non-slip soles.


No matter what walk of life you’re from, following the safety tips we’ve featured can help ensure you continue to walk in good health! And if you’ve decided to be safe and leave your exterior home improvement projects to the pros, our team at The Paint Manager can help you achieve the great results you want for your Central Florida home. Learn more about our exterior services – including painting, roof cleaning, pressure washing and stump removal – then contact us to get started!

How to Use Outdoor Lighting as a Home Improvement

How to Use Outdoor Lighting as a Home Improvement

When it comes to the looks of your home, the first impression does make a difference, and a positive one can have a huge impact. A beautiful home exterior not only increases the curb appeal of your home, but it also says a lot about the attitude of the homeowner. And, it is basic human psychology to strive for more and better, be it your job or the way you keep your home. There is a lot that you can do to improve the look and feel of your house. For example, an exterior paint job, pressure washing the exterior of your home and outdoor lighting are all home improvement projects that can revitalize the look of your house.

While this article focuses on the benefits of residential outdoor lighting, here are the main benefits of exterior home improvement projects, as provided by home improvement contractor Windows on Washington:

It increases the value of your home – When you undertake a home improvement project, it certainly increases the value of your home. An attractive home exterior not just reflects well on the homeowner, but it also increases the curb appeal of your property.

It makes home maintenance easier – Everyone these days is short on time. Exterior home improvements can help you cut down on the time you need to spend on the maintenance of your home. For example, siding installation makes it easier for the homeowners to maintain the house as they don’t have to spend time on repainting the exteriors over and over again. Similarly, a new garage door and energy efficient replacement windows also make it easy for the homeowners to maintain their house.

Energy savings – This is another important consideration that encourages homeowners to take up exterior home improvement projects. For example, siding installation can reduce heating and cooling costs by as much as 20 percent. Similarly installing replacement windows can also reduce your energy bills substantially.

An exterior home improvement that’s growing in popularity is adding an outdoor kitchen. This trend is especially catching on in Central Florida, thanks to our favorable year-round climate and love for outdoor entertaining. Our friends at Seriously Smoked provide plenty of great outdoor kitchen ideas for spaces of every size, and projects and grills for every budget.

Home exterior lighting ideas

While many people don’t necessarily consider exterior lighting a home improvement, a well-planed system adds beauty and security to your property. Exterior lighting can do much more than line walkways or illuminate entryways. Artful use of outdoor lights can define entertaining spaces – such as a patio – as well as call attention to landscaping features.

Contemporist offers several ideas for outdoor lighting, which include:

String lighting – If you are looking for an inexpensive and easy way of lighting up your backyard and garden, you can use string lighting. You only need to string them up, connect them to a socket, and you are ready to spend some quality time at night in your backyard or garden.

Lanterns – You can also use lanterns to light up your garden and backyard. They are not just easy to place, but are available in a variety of styles to set any mood.

Strips of LED lights hidden under the furniture or base of your stairs – If you want to transform your outdoor spaces and make it modern, you can use strips of LED lights hidden under the furniture or along the base of the stairs.

Uplighting – Another way of making a style statement is to place lights under the trees and plants (positioned upwards). You can also place these lights on the walls (facing upwards). Uplighting helps create a sophisticated, dramatic effect.

Spheres and orbs – You can also use spheres and orbs to lighten up your garden and backyard. You can put them up individually or use them in cluster forms on the ground to set a contemporary mood.

Pendant lights – For homeowners who have a dedicated dining area in their backyard, pendant lights help define the space, as well as better illuminate place settings for meals.

Budget-friendly home exterior lighting ideas

Home improvement projects, especially outdoor lighting need not always dig a big hole in the homeowner’s pocket. There are many budget-friendly home exterior lighting ideas that you can use to make your outdoor spaces brighter and beautiful.


HGTV offers the following inspirations:

Create a moonlight effect – Use small directional lights in a large tree to create a moonlight effect. You can supplement it with candle lanterns around the tree which is an affordable and easy option that you can do without the hassle of wiring.

Use lanterns to brighten up your outdoor space – One of the easiest, attractive, and effective ways of lighting up your backyard and garden is to use decorative lanterns. You can use them in a cluster on the dining table, line them up on the wall, or put them up in groups. Wax candles or outdoor LED candles can be used in these lanterns to lighten up the outdoor space.

Chandelier – If you have a dining space in your backyard, you can use a chandelier to create a stylish dining atmosphere. You can suspend a candle chandelier from the beam or covered patio. For easy operation, you can use battery-operated LED candles. You can use string lights radiating from the chandelier’s mounting to create a magical experience.

Use step lights – You can light up your steps and walkways with solar-powered lights, which you can install yourself. Mount them on any flat surface or place them on the ground to give a modern look to your outdoor space.  

Create a romantic glow – Group flameless LED pillar candles wherever you want to set a magical mood – patio, porch or outdoor seating area.

Vintage-style lights – These Edison-style lights with exposed filaments adds more style quotient to your outdoor space. If outdoor party lighting is what you are looking at, then vintage-style lights can bring on the magic.

String lighting – Positioned at regular intervals, you can use overhead string lighting to illuminate your courtyard. You can also use copper DSE uplights to illuminate the shrubs, trees, and pottery. You can also use café lights in a string formation which adds a magnificent glow to your garden or backyard. If you don’t have trees and other tall objects in your backyard and garden, then you can use temporary planters and wood posts to hang these lights. Of course, they’re always ideal outdoor party lighting!

Use planters – Planters that glow from within are becoming popular as intriguing accents for yards and gardens. Most are solar powered so that you can display them anywhere.

Solar deck accent lights – Everyone’s all-time favorite, this is another way to brighten up your deck railing, post, or stairs. Solar deck accent lights can turn on automatically at dusk, and it is an attractive option to illuminate your backyard and garden.

To learn more about innovative outdoor lighting ideas, get in touch with The Paint Manager. You can also contact us for other outdoor and indoor home improvement ideas that can boost your home’s curb appeal!

Why You (or a Pro) Should Pressure Wash Your House

Why You (or a Pro) Should Pressure Wash Your House

Ah, the joys of fall in Central Florida! As we ease away from worrying about hurricane season, temperatures begin to drop to the double-digits – making this the perfect time to get back to outdoor chores and home improvement projects before the thermometer dips even lower and it gets too cold for our thin Florida skin. Pressure washing (also called power washing) your house should be at, or near, the top of this list. Not only does a sparkling-clean abode show a sense of pride about yourself and your status in the neighborhood, it’s also a necessity to maximize curb appeal if you’re planning to sell, and to properly prep your house if you’re planning to paint.


If you can’t remember the last time you pressure washed your house, it probably could benefit from a good cleaning, no matter what your plans. It’s typical to not look at your home’s exterior closely, unless a problem becomes obvious. However, ignoring built-up grime, mildew, road dust (if you live on an unpaved street) and bird droppings not only creates a dingy appearance, but can actually damage your home and pose a health hazard. As noted by New Life Painting, mildew and mold continue to grow if left unchecked – and mold can grow within walls, meaning your home’s interior could be affected.


Do you dare DIY?


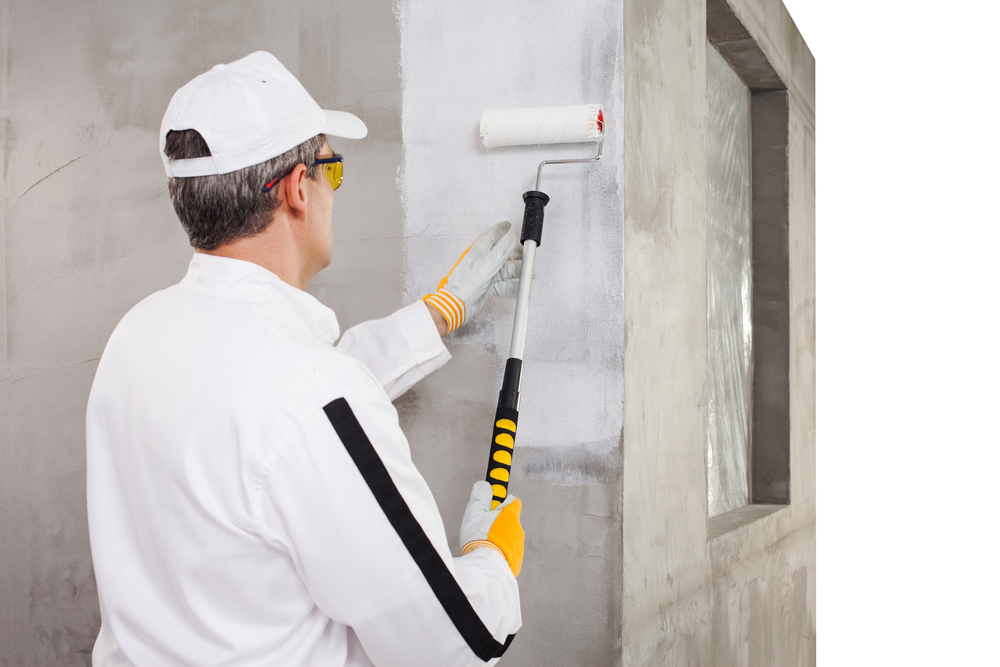
Pressure washing is one of those jobs that inexperienced, yet physically sturdy people often think they can take on themselves and save money. Of course, only you can judge your own capability to handle the equipment. Yet just because you may be able to wield the wand with ease, keep in mind that it can be hazardous if you aren’t familiar with how to work a pressure washer. Dangers include using too much pressure or the wrong nozzle – which can damage surfaces (such as siding, mortar and wood), break windows, and even cause injury. Improper use can also blast paint off, which means you’ll be repainting long before you intended. When it comes to safe, successful pressure washing, brain is as important as brawn.


Of course, hardcore DIY types probably already own a pressure washer, and therefore probably aren’t reading this. But if you’re generally handy with home maintenance and confident in your ability to tackle the task, renting the equipment at a home center is a good option. The advantage is in being able to talk to the rental associate, describe your house and get a recommendation on the type of pressure washer and accessories you’ll need. Being upfront with the associate about your experience level will result in the detailed, helpful advice and instructions that will allow you do to the best job in the safest way.


Once you’re set up and ready to start, become familiar with the wand or spray gun to work out the most effective spray pattern. You should use both arms to prevent fatigue. It is recommended to wash with the wand aimed downward, but there may be times you’ll have to aim it slightly up. As a general rule, work from the top down, and don’t spray water directly into cracks and gaps.


Safety first


Before getting underway, be sure you know how to use the pressure washer safely. Industrial equipment manufacturer Mi-T-M Corp. offers this helpful video of safety tips. Highlights include the following:

  • Read and heed all safety instructions on the equipment.

  • Wear safety goggles and closed-toe shoes.

  • If using an electric pressure washer, plug into a properly grounded GFCI outlet.

  • Place the pressure washer on a flat surface before starting.

  • Never point the nozzle at a person or animal; never come directly in line of the spray yourself.

  • Make sure the work area is clear of children and pets.

  • When not in use, hold the nozzle or gun assembly properly, so that water doesn’t accidentally spray.

  • When you turn off the pressure washer, release the pressure by squeezing the trigger before detaching hoses and nozzles.

  • Be careful before moving the pressure washer from one place to another, as the engine can get very hot.


Leaving it to the pros


If you’ve already decided that pressure washing is best left to the pros, The Paint Manager is ready! Our team has years of experience in power washing homes of all sizes, construction materials and ages to provide the best possible results. You can also contact us for innovative ideas on painting and repainting your home’s interiors and exteriors. We offer free estimates on all projects, and will be happy to help you take your home improvement plans to reality!

When to Paint the Exterior of Your House

When to Paint the Exterior of Your House

Painting your home’s exterior is perhaps the maintenance project that homeowners dread the most. Whether you choose to do it yourself or hire a professional, the task is expensive and nerve-wracking. If you’re like us here at The Paint Manager, you’re economy-minded, and consider any home improvement investment over $100 expensive. And although we pride ourselves on doing our jobs as quietly as possible, having people working on your property isn’t relaxing even under the best circumstances.


In Central Florida, the additional factors of intense heat punctuated by afternoon thunderstorms in the summer and hurricane season through November 1 compound the problem of finding a window of opportunity to accomplish this mission.


But first, let’s consider your motivation for painting your house. If you’re planning to sell, giving the exterior a fresh coat of paint is a sure way to boost curb appeal. This can also be the ideal time to update the colors to attract more interest among potential buyers. As with everything else, exterior colors go in and out of style – which means you want your house to look as up-to-date as possible. A newly painted house also creates the impression that the rest of the place has been regularly maintained and kept in good repair – and is therefore unlikely to present the new owners with nasty surprises.


If you’re planning to stay, this can still be a good opportunity to give your house an exterior makeover with an updated color scheme. However, your motive may be more than to create an impression – that is, you are regularly maintaining your home. Indicators that it’s time to repaint include:


  • Flaking, bubbling or cracking paint – These conditions often signal dry rot, wet rot or mold caused by failed weatherproofing. Strong sunlight, extreme humidity, storms, blowing sand and ocean breezes can contribute to the damage.


  • Hardened caulk – Caulking eventually loses its ability to expand and contract with your house. If the beads are hard and resistant when you press down, it’s time to recaulk – which typically means it’s also time to repaint.


  • Fading paint – Perhaps the most obvious sign. Sun bleaching is common, and dark hues tend to fade faster than paler shades. However, according to Nationwide, fading on shady sides of the house indicates problems with the vapor barrier or with water intrusion. Look for stains dripping downward on the paint. If water-soluble materials designed for home interiors end up outside the house, it’s a sign of water leaks. If you can’t pinpoint the source, call an expert.


  • Morphing paint color – Did your home’s color morph from sedate beige to pink? Blame ultraviolet (UV) rays, which can sometimes transform paint to an unexpected or undesired shade. To prevent this, make sure the paint is an exterior grade that can withstand UV effects.


  • Patching stucco – Stucco exteriors were popular in Florida in the 1990s, but fell out of fashion due to problems with the material adhering to the concrete block it was applied over. To minimize costs without re-stuccoing the entire house, patch stucco cracks and repaint the whole house. Otherwise, homeowners will be left with streaks or a patchwork from paint that doesn’t quite match.


The quality of the paint and painting materials you choose makes a significant difference in the durability of your exterior paint. Selecting high-quality paints and painting materials will ensure that your paint job lasts longer. Equally important is performing detailed prep work, should you decide to go the DIY route. Clean and sand the surface so paint adheres to it properly. Apply two coats for greater durability and longer useful life.


Now comes the question: How often should your paint your house? Assuming you don’t wait for it to acquire a weather-beaten appearance, the answer is: It depends on some variables – your region, climate and weather conditions, your home’s construction materials and the quality of those materials.


For example, houses with wood siding may require a repaint every three to seven years; every four years if it is stained. Other time frames are:


  • Stucco – 5 to 6 years
  • Brick – 15 to 20 years if painted; occasional pressure washing if not
  • Cement fiberboard siding – 10 to 15 years


If you are planning to have your home exteriors (and interiors) painted, and you need a professional home painting contractor, get in touch with The Paint Manager. Select the perfect color from our color picker page, or contact us for innovative house painting ideas!

A Fresh Look at Fall Colors for Your Home

A Fresh Look at Fall Colors for Your Home


After a summer’s worth of Florida’s triple-digit temperatures, many people are ready to welcome the cooler temperatures of fall. But in the Sunshine State, autumn is more a state of mind than reality. For this reason, we enthusiastically decorate to capture the spirit of the season. Now that the first cinnamon-scented brooms are making their appearance in supermarkets, we take a look at this year’s popular fall colors, and how to incorporate them in your home. From major projects – like painting a room – to introducing pops of color through accessories, everyone can enjoy a touch of autumn, even if the AC is still running non-stop. Here are some of our favorites here at The Paint Manager, offered by the experts!  


First up, author Cyndy Aldred, whose blog, The Creativity Exchange, focuses on color, paint and home improvement. Writing for Better Homes & Gardens, she makes the following observations. “Paint colors will continue to warm up this year. Common among the various trend reports are softer neutrals, creamy whites, muted colors, and rich dark hues.”


Although Aldred notes that paint manufacturers and other industry influencers made their pronouncements for the entire year, rather just autumn, the trend toward rich, deeper colors is especially suited for the season.


“Soft neutral paint colors will have warmer undertones this year, which make a space feel cozy and warm.” Aldred writes. “Mixing a soft neutral wall color with a dark or bold accent color in furniture, fabrics, or art is a beautiful way to add contrast to a space.”


Also, look for rich, dark hues – another common thread among the 2018 paint color forecasts. Designers are mixing these colors with whites and soft neutrals to create contrast and make a statement. If you want to be daring but don’t want to risk being overwhelming, choose a dark shade for an accent wall.


According to Aldred, other noteworthy colors are chestnut brown, deep burgundy, and dark blue – which can be used for interior doors, cabinetry and furniture, as well as walls. And consider a combination of rich colors paired with shiny finishes like brass or chrome.


Next, none other than lifestyle diva extraordinaire Martha Stewart, whose website provides idea-inspiring photos of 20 interior settings using fall colors. Overall, Stewart recommends such shades as orange, yellow, dark green, rust and brown as accents. These versatile colors can be used for walls, fabrics, accessories and floral arrangements.


Using different tones of one color help richen the effect, as does layering deep colors and textured fabrics. For example, Stewart picks out a red damask tablecloth, reddish-brown wall color and red lacquer accessories tinted with cinnabar or vermilion as variations on a theme of fall’s signature color.


Reporting on paint color trends for The Spruce, blogger Kelly Weimert identifies “An Abundance of Berries.” Weimert writes: “From strawberry red to raspberry pink to blueberry, well, blue, berry-inspired color palettes are bringing all kinds of vivacious cheer to interior spaces in the upcoming season.


“The beauty of this color trend is its versatility – bolder style sensibilities can select a bright red with which to make a striking style statement while more subdued styles will benefit from a softer raspberry hue to add increased warmth to their aesthetic.”


fall colors, fall home designFor those who prefer a more traditional take on warm autumn hues, floral arrangements are a perfect way to set the tone. Teleflora offers suggestions on its blog post, “Bring Stunning Fall Colors Into Your Home.” They’re all great ideas for those who have come to Florida from locales that actually have four seasons.

  • Decorate the coffee table with candles in seasonal colors and scents; feature a floral arrangement of flowers in fall colors, mixed with leaves (which, of course, Teleflora can supply). Great fall inspired decorations can be found at Furniture.com.
  • Use your imagination to spread small bursts of autumnal color throughout the home. For example, orange roses in small vases in the living room, bright yellow flowers in the kitchen and some deep, ruby red bouquets in the bedroom.


Feeling inspired to invite fall into your home year ‘round with warm colors on your walls?  The Paint Manager has over two decades of experience in providing high-quality, trusted full-service residential painting for homes of every size and age. Our team can provide décor ideas, does all the demanding prep work and performs skilled, meticulous application to ensure beautiful results. Contact us for an estimate.

Seven Top Home Painting Myths You Should Know

Seven Top Home Painting Myths You Should Know


For some reason, there’s no home improvement project that has more mythology surrounding it than house painting. Knowing fact from fiction is essential if you’re planning to do it yourself. If you expected the job to be easy-peasy, reading the following may prompt you to call a professional. Should you still decide to go it alone (or with family and friends), at least you’ll have a better idea of what you’re getting into.


Home DIY, home painting, painting myths

  1. You don’t need a primer – Some people believe it’s important to use a primer, while others think it’s a waste of time, money and energy. The fact of the matter is that if you want to make your walls look smooth, perfect, and professional, you should always apply primer. Moreover, one of the main reasons why using a primer is necessary is because it helps the paint bind well to the wall.


  1. You don’t need to clean or sand the walls if you use a primer – No matter how high-quality the primer, it won’t adhere well to a greasy or uneven surface. Family Handyman notes that you should pay special attention to high-traffic, high-touch areas, as well as kitchens, baths and baseboards.


  1. You always need to apply two coats for a perfect finish – This may have been true in the past, but the quality of paint has improved over the years. If you apply primer, a single coat should be sufficient. However, if you don’t use primer or are applying a lighter shade over a dark color, two coats may be necessary.


  1. Painting the ceiling makes the room look smaller – If interior décor experts are right in declaring that accent walls are no longer trendy, the accent ceiling is on the rise, so to speak. In fact, light walls with a dark ceiling can create the illusion of a taller space. Queen Anne Painting of Seattle expands on this as follows:Home DIY, home painting, painting myths

“… if you paint the ceiling light blue, the room will appear to have a much taller ceiling when in fact, it is the same height it has always been. If you want to avoid the ceiling appearing smaller, be sure you use a medium shade on the walls and a shade or two darker on the ceiling.”


  1. Don’t use dark colors, as it will make a small room appear smaller – Not true at all. A room will look big or small depending on the way you style it, and not on the color you use on the walls and ceilings. The way you light the room, the kind of floor you opt for and the type of furniture you use will determine whether your space looks larger or small. In fact, dark walls can make your room appear larger if you do it the right way. If you have lots of windows, light-colored floors and furniture, a bold color can add to more flavor to your room than lighter shades.


  1. You don’t need to paint your house if you are planning to sell it – If you’re not selling your home as a “fixer-upper,” most buyers are looking for a move-in ready house. Painting your interior walls neutral colors throughout will create a fresh, clean look that will appeal to the majority of homebuyers. Also keep in mind that dingy walls painted in outdated colors may raise a red flag to potential buyers that your home may not have been carefully maintained, and serious problems could be lurking.


  1. You don’t need to hire a professional painting company This depends. Most homeowners lack the experience, expertise and equipment to achieve professional-quality results – not to mention time. Those who are inspired by the numerous home renovation shows on cable TV may think they can tackle the job, but reality could be quite different. If, however, you have a good deal of practical experience on a rehab project or two (and the right equipment), going the DIY route might be successful.


Speaking of house painting professionals, The Paint Manager has over two decades of experience in providing high-quality, trusted full-service residential painting for homes of every size and age. Our team does all the demanding prep work and performs skilled, meticulous application to ensure beautiful results. Contact us for an estimate.

Hurricane Season is here! Are you ready?

Hurricane Season is here! Are you ready?

Hurricane season officially started on June 1, and will run through November 30. There are a number of steps of you should take in preparation for potential hurricanes, the intensity of which seems to increase yearly. Complete the following supply and safety checklist, and speak to your family about the actions you will take should a hurricane approach.

Have a Hurricane Safety Checklist

Although hurricane season has started, it is never too late to take the necessary steps to protect your home and family. Use this hurricne safety checklist from the National Hurricane Survival Initiative. It provides a comprehensive list of the items you may need in should a hurricane hit your home.

Make sure you download and save the website’s PDF checklists for convenience and reference.

Essential items include:

  1. Food and water.
  2. Battery-operated radio, flashlights and extra batteries.
  3. First aid and non-prescription drugs.
  4. Tools and supplies.
  5. Sanitation, clothing and bedding.
  6. Special items.
  7. Possessions and documents.


Hurricane Do’s and Don’ts


Should you choose to ride out a storm, the preparedness of your house makes all the difference. New or old, your home should be fortified to protect you and your loved ones from the dangers presented by a hurricane.

Consider these common mistakes Florida homeowners make when it comes to hurricane preparation, and how you can avoid them.

1- Don’t:Tape your windows. 

Do: Apply storm panels or shutters. A number of options are available, including plywood, metal, plastic and fabric. Whichever material you prefer, all effectively add protection for you and your windows.


2- Don’t: Empty your inground pool. 

Do: Leave the water level alone and remove any loose equipment. Draining the water can cause hydrostatic pressure beneath your pool, causing it to ‘pop’ out of the ground. This is a risk for both inground fiberglass and concrete pools. For a great explanation of this big word, read this informative article by Holly Jender for River Pools.


3- Don’t: Open windows or doors to ‘equalize pressure.’ 

Do: Keep your windows and doors shut and secured. Exposing them to harsh winds can turn them into dangerous debris. By opening either structure, you also increase the chance of negatively affecting the interior pressure of your home, compromising the integrity of your roof.


4- Don’t: Neglect your roof. 

Do: Regularly inspect, clean and repair your roof. When it comes to hurricanes, your roof is the integral structure that protects you from wind. Without it, your home’s walls can collapse, causing injury or leaving you exposed to the elements. Invest in a high-quality roof and any necessary equipment to back it up, such as roof clips.


5- Don’t: Leave debris clean-up for last minute. 

Do: Regularly tidy your yard and maintain foliage prior to and during hurricane season. Trimming your trees and bushes helps create wind resistance, preventing the chance that they will become harmful debris. Any outdoor furniture and other loose items should have a designated area for quick storage.


6- Don’t: Forego a backup power supply. 

Do: Purchase a generator and learn the safe way to operate it. To prevent death from carbon monoxide poisoning, DO NOT OPERATE indoors. Be sure to follow all manufacturer’s safety instructions. If possible, have it installed by a professional. As hurricanes approach, generators become a prized commodity – one you do not want to be stuck without. In the event that power can not be restored for days or weeks, a generator can provide power to essential appliances.


After the storm


In the wake of a hurricane, it is of the utmost importance that you wait for an official declaration that your area is safe. Continue listening to NOAA Weather Radio for updates and announcements.

In the likely event of lost power, you may be unable to access information regarding the storm’s location. In many instances, people have mistaken the calm ‘eye’ of the storm as an indication that it passed through the area, and that the danger is over. Moments later they find themselves exposed to the harshest extent of the hurricane. Also look out for tornadoes. For every hurricane that makes landfall, the formation of at least one tornado is likely. Tornadoes are known to spawn up to three days following a hurricane.

Hurricane winds themselves typically account for only 50% of storm-related deaths. The other half are due to subsequent flooding. As Florida is prone to flooding, staying up-to-date on your proximity to flood zones can help you prepare. Even areas that had never before experienced flood waters are now susceptible. Recent studies show a 20% to 30% slow-down over land areas affected by North Atlantic and North Pacific tropical cyclones. Slower forward speed means increased rainfall and a greater likelihood of inland floods.

You should use equal caution in handling your supplies, and being exposed to the dangers presented by hurricane damages – such as fallen power lines. Read this article from the Center for Disease Control and Prevention to learn about indoor and outdoor post hurricane safety tips.

If your hurricane preparedness includes roof cleaning, home repairs or shrub trimming, contact The Paint Manager. Our experienced team can help you complete your Florida hurricane preparations, and give you peace of mind when it comes to protecting your family.

4 Reasons Why You Need Professionals For Drywall Repair

4 Reasons Why You Need Professionals For Drywall Repair

DIY Drywall, Good Idea or Not?


We all want to live in a beautiful, clean and green home. But, it requires quite an effort on the part of the homeowner to maintain a house that is striking, beautiful, clean, and which is full of greenery. A feat difficult to achieve, homeowners constantly have to strive hard to create and maintain a perfect home.

As a homeowner, you don’t only have to ensure that your home exteriors look beautiful, but you also have to make sure that the interiors, landscape, driveway, pool, and everything else in your house remains in perfect order. A lot goes into creating a home that is beautiful to look at, and a delight to stay in. From a well painted exterior, a nicely maintained landscape, and a perfect pool setting to stylish furniture, attractive paint on the walls, and more, you have to plan everything to perfection.

Integral parts of your home, walls and ceilings, play an important role in making your house look beautiful. And, when the interiors of your home have drywall ceilings and walls, it looks even better.  But, like everything else, even drywall doesn’t last forever. It requires regular upkeep, and at times replacement, when damaged beyond repair.

Though, more often than not, repairing is all it takes to give your drywall a perfect finish. Needless to say, without proper paint and finish on your walls and ceilings, your home interiors can’t look elegant. And, when the wall itself is not in perfect shape, then no amount of paint, good or bad, can produce the looks that are flawless. With drywall, you get a perfect finish, and then the paint on these walls look great.

Leave Your Drywall Repairs to the Professionals 

There are some home jobs that you as a homeowner can do on your own, but you just can’t repair everything in your house. But, there are some homeowners who think they can fix anything and everything that needs repair in their home. It is true that internet helps you learn a lot of things, be it fixing, or repairing a door knob, or changing your sink faucet, but there are some home jobs that are best left to professionals. And, repairing drywall is one such work, which should only be left for professionals to do.

Drywalls are building materials used as a substitute for wooden or concrete walls, which are not just inexpensive, but it also gives a wonderful finish. The only flip side to this is that drywall is softer in comparison to concrete or wooden walls, and therefore they are more prone to damages if proper care is not taken. Of course, when you have damaged walls at home, you need to get it repaired, or else it can spoil the beauty of your house.

When you watch videos online of people teaching you how to repair your drywall, you are bound to think that it’s an easy job and a perfect DIY project, but we tend to forget that the precision it requires (in repairing) calls for professional help.

Moreover, trying to fix a drywall yourself you might end up making the repair work even costlier, as the damaged area can increase further, which would then escalate your total cost. Hence, whenever you need your drywall to be repaired, it is advisable to call in experts.

4 specific reasons why you should call in professionals for drywall repairThe number one reason why you should call in experts if you have a damaged drywall is to maintain the peace of your house. Yes, any DIY project creates some amount of stress in the house. But, on a more serious note, here are 4 specific reasons why you should call in professionals for drywall repair.

  1. They (read professionals) know their job wellAn expert drywall repairing company, apart from knowing their job well, also realizes the unique needs of each of its customer, and therefore presents to you a customized solution. Drywall repair professionals have been through it all and seen every kind of damage your drywall would ever experience. They know what exactly needs to be done to fix the problem on your drywall. From estimates to the exact course of action, you have everything in black and white in front of you, which makes it easy for you to take a call whether to repair or replace the drywall.
  1. They have loads of experience and expertise – There is no substitute to experience, and with it comes the exposure and expertise of repairing the drywall, no matter how bad the damage is. DIY enthusiasts, or individuals and companies who don’t have sufficient experience and expertise of repairing the drywall could spoil your project and increase its total cost, whereas professionals do their job to perfection.
  1. It saves your precious time – Time, they say, is money, and you of course don’t have enough of it to waste. A project which professionals would be able to finish in a couple of hours, people with less, or no experience will do the same work in a couple of days. In today’s fast paced world, you don’t have that much of time to waste, do you? It therefore makes no sense to waste your precious time, instead it is better to save it and utilize the same in other productive work. Hence hiring professionals to repair your dry wall will save you time.
  1. They have the right equipment – Being in a different profession, it is highly unlikely that you would have all the tools that are required for drywall repair. When you hire professionals, one thing that you can be assured of is the latest equipment for the repair job of your drywall. Needless to say, you can spoil your wall further if you don’t have the requisite equipment. Moreover, just by having the right equipment does not guarantee that the job you do on your own will have great results because you should also have proper practice of operating these tools. And, when you hire professionals, not do they have the right equipment, they also know how to use it, which produces better results.


Apart from the reasons mentioned above, you also run the risk of injury and harm to your health, when you plan to repair the drywall on your own. Whereas, when you hire professionals, they not only know how to avoid injuries, but they also take necessary precautions that are required during the process of drywall repair.

Over and above this there is a huge difference in the quality of repair work done when you do it on your own, and the drywall repair that is undertaken by professionals.

If you are in and around Greater Central Florida and drywall repair is what you are looking at, don’t take chances of doing it yourself. Just get in touch with The Paint Manager, paint and drywall experts, and leave your worries to the professionals.

We have been in this industry for long to know the nuances of the trade, and know exactly what it takes to repair any kind of drywall.

We also have all the right tools and trained manpower who know how to use them efficiently, which ultimately gives your drywall a perfect finish.

Do it Yourself: The Seven Blunders of Interior Painting

Do it Yourself: The Seven Blunders of Interior Painting

When you want to spruce up your home, change can be a good thing. Sometimes rearranging the furniture does not quite satisfy, and new appliances can get really pricey. The idea of a do it yourself project crosses your mind…

Painting your home’s interior can be of the most fulfilling, lasting improvements you can make in your home. Of course, redesigning anything in your home can become a tedious job, especially if you do it yourself! But what happens when DIY projects go wrong?

No one wants to live in a house with a bad paint job.

Your home should be welcoming, comforting and fulfilling to live in. When it comes to DIY projects, you quickly realize that some things really do require a pro. No matter how easy it may seem early on, it is fairly easy to slip up along the way.

But, if you’ve decided that you want to rise to the challenge of painting your own house, let us be your guide to a beautiful home.

Here are a few things you can do to avoid the seven blunders  of house painting, and earn your wings as a DIY painting master!

The Seven Blunders of Painting

Consider these points a checklist for your upcoming DIY project. The fate of your home’s walls depend on it.

1.Forgetting to Prep 

do it yourselfHow do you tell the difference between a professional painter, and a first time do-it-yourself-er? A pro always takes the time to prepare the surfaces.

Pay attention to those who do commercial painting. You will notice that they spend time cleaning the walls, putting tape around the edges, and applying primer. Pros also cover the surrounding furniture and use drop cloths to protect the floor. You might even notice that doorknobs are wrapped and switch plate covers are removed.

Wash and clean your walls long before you pick up the paintbrush. Use old newspapers, painter’s tape and plastic to cover everything you wish to protect. Look for cracks, holes and chipped paint, and fill them before starting. If you do make any repairs, make sure you sand down the surface before applying primer or paint.

Invest the time in prepping. A great final result requires a strong foundation.

2. Selecting a Color for the Wrong Reasons

When you go to the store to purchase paint, never buy it based on how it appears in the store. The color will almost certainly look very different under bright, florescent light. Do not expect it to have the same appearance in the sun or under standard home lighting. In fact, Apartment Therapy recommends these 10 tips for choosing colors for your kitchen and bathroom in this post.

 The same goes for that color you saw in a magazine. Any color paint will look much different under professional lighting compared to how it will look in your dining room.

Do not rush when making your color choices, either. The best way to avoid picking a color you will inevitably hate? Choose multiple shades, and bring home samples of each of them. Try them each on one of the walls you are planning to paint. Compare each one under your home’s natural lighting. Yes, this may mean more time until your walls have a shiny new look. Be patient. The waiting will pay off soon enough.

3. Using cheap tools

Getting the right kind of tools for a DIY project can make or break the end result. Though cheap brushes, rollers and paint sprayers may tempt you, never compromise on the quality of the tool. Good brushes have top-notch bristles which allows you to paint faster, with a professional-looking end result. When it comes to rollers, look for one with a strong, thick foam. A cheap sprayer will fail at spreading paint evenly. Some will even burn out midway, leaving you without a tool to get the job done.

Use painter’s tape wherever required. Never use masking tape in its place. If you want a professional quality paint job, use professional quality tools.

4. Using the wrong paint for the job

do it yourselfThere are numerous types of paint on the market. Knowing what types are appropriate for the job can make or break your project. In high traffic areas, such as the hallways or entryway, use satin finish. Accent walls work best in matte finish.

Knowing which paints work best with specific tools will help prevent major blunders as well. FYI, not all paint works inside a sprayer!

Always seek the opinion of a professional. You can often find experts on paints in the store that you purchase from. Let them save you from the mistakes you did not even know you could make, like using pressure washing services inside, rather than outside.

5. Painting in poor light

Light makes a lot of difference, and if you paint a room in dim light, your final result may be deceiving. You can see greater details in bright light, meaning that the work you assumed looked perfect, might actually be pretty sloppy! Open the windows and let the light in while painting. Avoid painting after the sun goes down and under harsh florescent lights.

6. Painting over a glossy wall

do it yourselfIf you’ve ever had a manicure, you will probably know why doing this can be a problem. There is a reason the nail artist removes the old coats of polish. Painting over an already glossy surface could end in an uneven finish, chipping, cracking, or discoloration. Paint requires a slightly gritty surface in order to stick. Glossy walls lack the right texture to hold on to the paint properly.

 To avoid this scenario, prepare the wall properly. Sand the painted walls down gently, creating the necessary grit to hold the paint. Then, wipe down the wall with a wet cloth to remove dust and debris. Once the wall is dry, start painting.

7. Forgetting to use primer

Buying a 2-in-1 paint and primer sounds like a great way to save time and money, right? Wrong. Many first-time painters are unaware that this product only works with smooth, clean walls. In the case of a rough or textured wall, use a separate primer.

On a textured wall, the substance creating the texture, such as drywall, has absorbent properties that can act as a sponge to a fresh coat of paint, leaving the wall blotchy and uneven.

If your home makeover plans include a glossy wall, pick up some primer. A bonding primer will stick straight to the surface, providing a good, clean backing for the shiny new color.


Avoid these all-too-common painting errors, and tackle your first do it yourself home painting project like a pro!

As with most home improvement projects, practice makes perfect. Relish in the experience of taking the fate of your home’s look into your own hands.

Before things go wrong, however, it is always smart to consult a painting contractor before picking up that paint roller. Before things go wrong, call The Paint Manager for all of your residential painting needs.

Go Top
Skip to toolbar