How to Paint a Bathroom

How to Paint a Bathroom

Be it the primary bathroom, guest bathroom or powder room, a fresh coat of paint can give an immediate visual lift that updates its look and makes it more inviting. Whatever its size, however, a bathroom could be deceiving in sizing up. Because it’s a small space – even for a typical primary bath – homeowners tend to underestimate the complexity of doing it themselves, and can quickly find themselves in over their head.

You may at first be looking at relatively small areas of wall surface, but will soon encounter such obstacles as the vanity, toilet, light fixtures and shower tile. As home improvement expert Lee Wallender writes for The Spruce, “Bathrooms are small and full of water from various sources, and they receive lots of heavy use. For beautiful results, it is important to pay special attention to all aspects of bathroom painting, from surface preparation and color choices to the process of painting and final touches.”

For what happens if you don’t, our blog post – “Common Interior Painting Mistakes to Avoid” – describes the consequences of mistakes in paint selection, prep work and application techniques.

Choosing the Right Type of Paint for Your Bathroom

Because bathrooms are regularly exposed to a high amount of moisture, choosing the right type of paint is important. According to Forbes Home, the best type of paint for bathrooms is a satin, semi-gloss, or glossy finish with a mildew-resistant additive.

“Humidity is a threat to the look and performance of paint. Moisture, like steam from your shower, can seep between the wall and coat of paint, creating unwanted texture, bubbling and peeling. Paints with a glossy finish are moisture-resistant because once cured, satin and gloss finishes form a hard coat that blocks out water, allowing it to drip to the floor rather than seep through to the drywall or wood. High-gloss and enamel paints look, feel and act more like glass or a dry-erase board.”

Low-sheen paints – such as flat, matte or eggshell finishes – may be appealing if you’re trying to conceal surface irregularities, but are softer and absorb moisture, encouraging mildew growth. Also, they’re harder to clean. If you prefer the look of these types of finishes, paint technology has come a long way in recent years. There are matte, flat and eggshell bathroom paints made to resist mildew and make cleaning easier. Ask for assistance in the paint department of your local home improvement store. The sales associate will be able to help you find the right paint.

Here is a breakdown of the other types of paint:

Satin – This sits between eggshell and gloss paints. It develops a slight protective coating, making it a little easier to clean than no-sheen paints. Satin is a good choice for the bathroom if you want a softer-than-gloss texture that has many benefits of a gloss finish. It’s great for bathroom walls, ceiling or trim and is relatively easy to clean, but not as easy as semi-gloss or gloss.

Semi-gloss – This is one of the most versatile paint finishes because it is easy to clean and water-resistant, making it a great choice for your bathroom walls and trim – as well as cabinets. However, it does show imperfections in the wall surface.

Glossy and Full-gloss – These paint types offer the most protection from moisture, and are the most durable. Glossy finishes are the easiest to clean, also making them perfect for bathroom cabinets and trim.

In addition to the paint type, consider the paint color for your bathroom. Of course, light-colored or neutral walls will make the space look larger and brighter. Forbes Home points out another advantage: they can optimize the brightness and clarity of your mirror’s reflection because they reflect more light. “In contrast, dark paint colors will absorb more light, resulting in a less vibrant reflection. Warm colors can cast a warm glow, while cooler colors can cast a cooler tone, affecting the reflection that you’ll see in the mirror.” So keep this in mind if you want a flattering light that will give you a healthy, more youthful glow!

Prepping the Bathroom

As with painting any interior room, proper prep work is essential in achieving a professional-looking, durable result. You may not typically think about it, but bathroom walls and even ceilings and baseboards become covered in soap scum, water streaks and built-up residue from hairspray and other personal grooming products. Painting without cleaning can cause the paint to quickly peel off – assuming it will stick to the walls in the first place!

The first step is to thoroughly clean the walls and baseboards with a degreasing detergent. Dengarden recommends a degreasing dish detergent for this task, but if a stronger cleaner is necessary, use trisodium phosphate (TSP). As Wallender writes, TSP “… might be considered a miracle cleaning product because it is so inexpensive, cleans off the gunk, and won’t compromise your paint job.”

Mold and mildew occur on bathroom walls due to high humidity and poor ventilation and/or infrequent cleaning. If this is an issue, you must remove it before painting, or it will quickly grow back. Cleaning the walls with straight vinegar, baking soda, Borax or hydrogen peroxide will kill the spores and prevent regrowth. According to Dengarden, vinegar doesn’t smell great, but it’s non-toxic, and the acidity of vinegar is effective for killing mold on porous drywall.

To remove mold and mildew with vinegar, pour white distilled vinegar into a spray bottle, or a pump sprayer. Spray undiluted vinegar onto the mold and let it penetrate the surface for a couple of hours. After allowing the vinegar to eat into the mold, scrub the drywall with a stiff bristle brush until all of the mold and mildew has washed off. Wear a respirator, or at the very least, a dust mask, to prevent inhalation of mold spores during cleaning. Allow the bathroom to totally dry out with the windows open before applying mold-killing primer and paint.

CAUTION: Never mix vinegar with bleach. Mixing the two together produces poisonous gas.

After the walls, baseboards and ceilings are clean, remove switch and outlet plates, mirrors, bathroom exhaust vent grilles, towel racks and any other items that you can remove relatively easily. Then, cover areas that will not be painted. Tape off the ceiling, trim, bathtub surround and backsplash. Drape drop cloths over the bathroom vanity, sink, mirror and flooring.

Some DIY experts recommend removing the toilet tank to provide easier access to the wall behind the toilet. If you feel confident in doing so, follow these steps:

  • Turn off the water supply at the shutoff valve on the wall.
  • Flush the toilet to expel all water.
  • Remove the tank, using old towels on the floor to catch water spills.

Removing the toilet tank should be a two-person job to prevent dropping it, as the tank is heavy even when empty – so consider the potential for disaster if deciding to do this. Painting behind an intact toilet requires some awkward maneuvering, but is preferable to dealing with a big watery mess, or cracked tank and cracked floor tile – or a back injury!

Use the Right Technique When Painting Your Bathroom

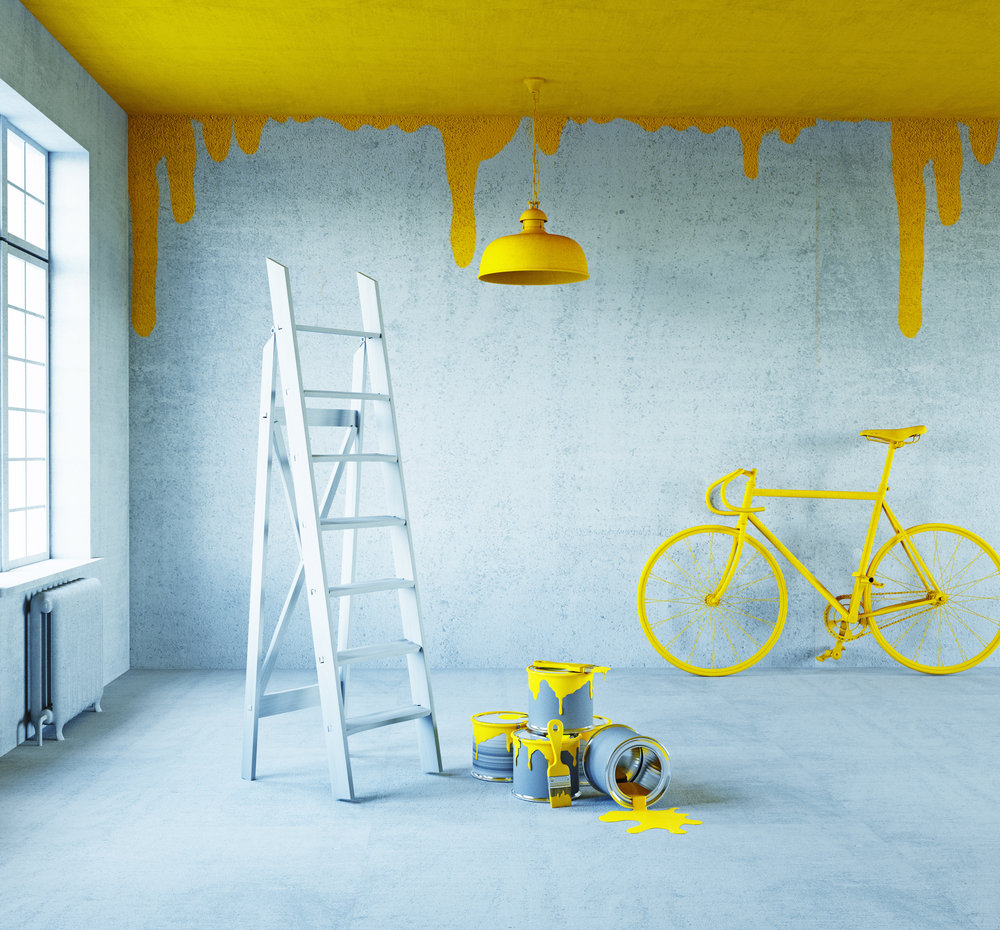
Now you’re ready to paint! Start with the ceiling. If your bathroom is prone to excessive moisture, use a glossier paint such as semi-gloss or satin on the ceiling.

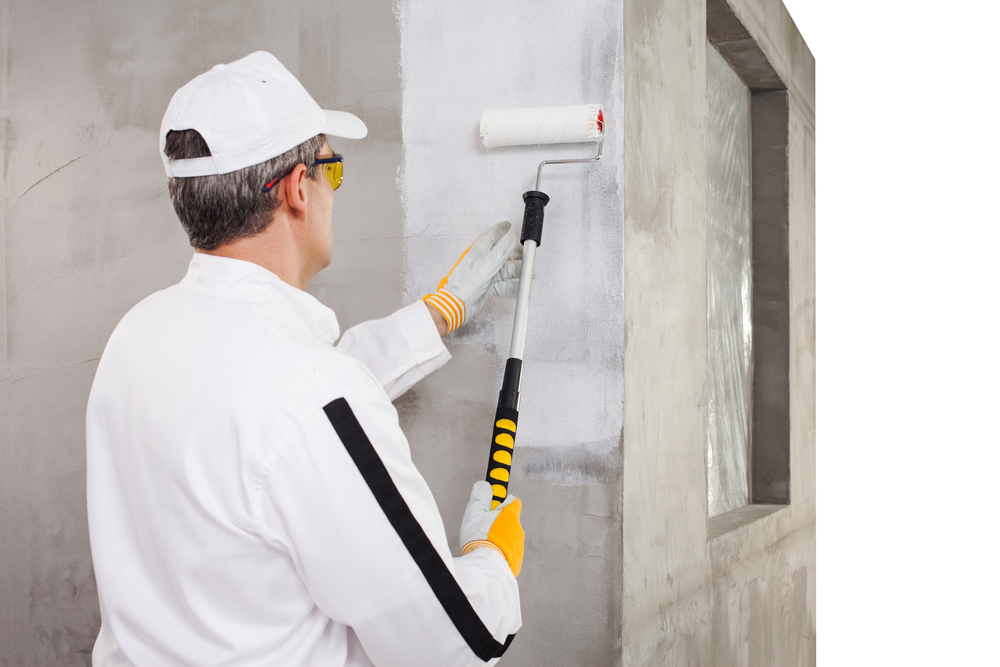
  1. Prime the walls: Even though it is not necessary, priming your bathroom walls will ensure that your paint adheres to the surface better. It will also minimize the number of top coats required. Don’t forget to apply the primer to the bathroom edges and corners using a paintbrush. 
  2. Cut-in the bathroom ceiling corners: You don’t have to be extremely precise when cutting in paint lines on the walls but for the ceiling, you have to. Fill all the ceiling corners with your paint. If you don’t want to repeatedly climb up and down the step ladder, you can use an extendable paint brush when painting the ceiling.
  3. Roll the bathroom ceiling: 9-inch rollers that are lint-free are ideal. You can also use lint-free fabric rollers. Use a 1/2-inch roller nap to prevent a heavy stippling texture.
  4. Paint the trim: After painting the ceiling, start painting the trim. Once you have finished painting the trim, tape it off, and – at last – paint the walls.
  5. Paint the walls: Tape off the bathroom baseboard using painter’s tape. Cut in the bathroom walls, then roll the walls. We recommend using two coats of paint for better durability and a professional look. To paint the area behind the toilet, use a 4-inch roller. If the gap between the wall and the toilet is too small, use a brush to paint it.


Should You DIY or Call a Professional to Paint Your Bathroom?

As we always say, this is a question only you can answer! If you’ve successfully completed DIY home improvement projects and have the right tools, supplies and protective clothing, painting a bathroom could be in your wheelhouse.

However, if you thought that painting a small bathroom would be easy as pie, a walk in the park or any other simile – and now think differently after reading this blog post – call our professionals at The Paint Manager! We have the experience, skill, equipment and supplies to make sure the job is done correctly and safely!

The Paint Manager has been proudly serving Central Florida homeowners for over 20 years with experienced, dedicated and professional services that include exterior and interior house painting, roof repair and cleaning, drywall repair, popcorn ceiling texture removal, cabinet refinishing and so much more!

Plus, become a member of The Paint Manager to receive a 15% year-‘round member’s discount. Contact us to learn more about our services and membership discount offer. We look forward to meeting you!

How to Repair Exterior Stucco

How to Repair Exterior Stucco

Homes with stucco exteriors are popular in Central Florida for the upscale image and curb appeal they provide. Whether stucco is used in new residential construction, or in a remodeling project to cover concrete block, however, it can be prone to cracking. While homeowners typically consider this an aesthetic issue, cracks in stucco can cause serious structural problems, depending upon the construction material over which it’s applied.

But first, what exactly is stucco?

Stucco is a cement-type mixture made of Portland cement, sand, lime and water. It is a thin finish coat that goes on the outermost layer of residential and commercial constructions. Stucco is applied wet and hardens to a very dense solid. Understanding the factors that cause stucco to crack and how repairs can best be made will help you determine whether you can do the job yourself, or need to call a professional.

What Causes Cracks in Stucco?

In his article for Daily Commercial, Don Magruder – CEO of Ro-Mac Lumber & Supply, Inc. – explains the most common causes of cracks in stucco.

“There are two basic stucco applications used in Florida. A standard stucco application consists of using a weather-resistive barrier with a metal lath that is attached to the substrate of the building, then applying three coats of masonry stucco cement: A 3/8-inch scratch coat, followed by a 3/8-inch brown coat and a 1/8-inch finish coat.

“A cementitious stucco application refers to masonry stucco cement being applied directly over masonry block at a thickness typically of 3/8 to 1/2 inch. Because the cement is applied directly to concrete blocks of the home, it is common to see the block lines in the walls.”

This basically means that stucco exteriors are very likely to develop cracks.

“The primary ingredient in stucco is Portland cement,” Magruder writes. “There are three things in life that are certain: Death, taxes and that cement will crack. The main cause of stucco cracking in Central Florida is where and how the cement is used – it’s a design issue. Most of the problems are in two-story homes with a masonry block first floor and a second story built of wood. Because of the flexing and expansion of wood in the second story, the stucco cracks. Unless a building is painted and maintained with a very good elastomeric paint and openings are kept caulked, there can be water intrusion.”

Another major cause for second-story stucco failures is poor door and window installations. Design flaws such as very short roof overhangs and the failure to use proper drip caps over windows and doors can exacerbate moisture running down a two-story home.

According to Waypoint Property Inspection, “In the case of a wood-framed home, water can enter those cracks which rust the metal lathe, and when the metal rusts, it expands so it can pop stucco off your home. Not to mention, continuous water entry through stucco cracks can find its way through the underlayment and rot out a wood-framed home. If stucco is popping off your home, the stucco will need to be removed and replaced by a licensed professional.”

In the case of stucco applied directly to concrete block, water can enter through cracks and the cement soaks up the water just like a driveway or sidewalk. Then, you have the potential for water intrusion in your home.

What to Do and Not to Do in Repairing Stucco

Small, thin cracks (a.k.a. hairline cracks) – especially those occurring in stucco over concrete block – can be repaired with exterior latex paintable caulk. Choose a caulk color that is close to your stucco color. Touch up the caulked area with an exterior paint that matches your house color. If you have paint left over from your last exterior paint job and it’s still in date, all the better. Follow the caulking tips from True Value below for the best results:

  1. Use a utility knife to cut the nozzle of the caulk at a 45-degree angle, and place the caulk in a caulking gun. Puncture the internal foil patch at the base of the nozzle with a nail or other slender sharp object.
  2. Hold the caulking gun at a 45-degree angle parallel to the crack being filled and pull the nozzle along the crack. Don’t push it. Position the nozzle opening so that it forces sealant onto the crack.
  3. As you finish applying each bead of caulk, release the trigger and pull back on the caulking gun rod to stop the flow of caulk and relieve the pressure inside the tube. Releasing the trigger alone will not stop the caulk from flowing out of the nozzle.
  4. Let the caulk set for the manufacturer-recommended amount of time.


To repair stucco applied over a weather-resistive barrier with a metal lath attached to the substrate of the house, Don’s Bay Area Painting provides the following step-by-step instructions:

  1. Make the stucco crack bigger. Although it seems counter-intuitive, you’ll probably need to make the crack wider. It should be at least a quarter inch wide throughout the length of the crack. You might need to carefully chisel the edges of each crack so that they are beveled evenly.
  2. Brush away any loose stucco. If any of the stucco is crumbling, you’ll need to use a brush to remove it gently before you can fix the cracks. Be gentle and work slowly using a brush so you don’t cause more breakage.
  3. Mix the right stucco crack repair formula for the job. Choosing the right stucco repair materials for the job is critical. Interior stucco is different from exterior. Different surfaces require different mixes, as well. If you get the wrong stucco, you’ll end up with obvious lines showing where you ‘repaired’ the cracks.
  4. Apply the new stucco into the cracks. Work slowly enough to be neat, but quickly enough to keep your material wet enough to use. If you’re repairing stucco cracks that are narrow, you may be able to work with a caulk gun – if you can get the nozzle tip small enough to fit in the crack. You want the stucco repair material to go deep into that crevice.
  5. If you’re working on a stucco crack that’s more suited to a putty knife or trowel, spread the material onto the area to be patched, then add texture to match the rest of the wall. If you want a smooth look, you can wet your trowel. Either way, it’s better to apply thin layers as you work rather than slopping it on all at once. Allow each layer you apply to dry before adding another layer.


There are two major mistakes to avoid at all costs:  

Not cleaning the stucco first – If you don’t, your repaired stucco cracks will only become way more visible than they were. Picture white lines snaking up the side of your beige, buff, or gray house. Not the result you want at all. Power washing is best.

Getting too enthusiastic while removing the old stucco – This can cause more damage in the process. In fact, it’s possible that the old stucco has bonded to the surface of your structure, and you could end up pulling entire chunks of your wall off if you’re not careful.

After the cracks are repaired and the stucco cures, you may want to take the opportunity to repaint the entire exterior of your house. This will completely cover any evidence of the repairs, as well as help protect against future cracking if you use a high-quality elastomeric paint.

Should You Do It Yourself or Hire a Pro?

Beyond dealing with hairline cracks – which mainly requires cleaning the cracks then filling with an elastomeric caulk, and painting the area to match the color of your house – we strongly recommend you hire a professional. Some people may feel confident enough to use a hammer and chisel to make a crack larger, but it’s a recipe for disaster for most homeowners. Also, as Waypoint Property Inspection notes, situations in which stucco falls off the house requires the stucco to be removed and replaced by a licensed professional.

We provided DIY instructions to give you the complete breakdown of the work involved so you can determine if this is a project you can successfully accomplish. As always, we urge you to be honest with yourself about your experience, skill level and physical strength before attempting any type of extensive home repair or improvement project. And don’t rely on YouTube videos to learn how. As our blog post – “Hire a Handyman This Year! Here Are The Advantages!” – covers, they can give false encouragement to inexperienced homeowners by making it look easy.

The Paint Manager offers experienced, professional stucco repair. Our team has been proudly serving Central Florida homeowners for over 20 years with services that include exterior and interior house painting, roof repair and cleaning, drywall repair, popcorn ceiling texture removal, cabinet refinishing and so much more!

Plus, become a member of The Paint Manager to receive a 15% year-‘round member’s discount. Contact us to learn more about our services and membership discount offer. We look forward to meeting you!

A Fresh Look at Fall Colors for Your Home

A Fresh Look at Fall Colors for Your Home


After a summer’s worth of Florida’s triple-digit temperatures, many people are ready to welcome the cooler temperatures of fall. But in the Sunshine State, autumn is more a state of mind than reality. For this reason, we enthusiastically decorate to capture the spirit of the season. Now that the first cinnamon-scented brooms are making their appearance in supermarkets, we take a look at this year’s popular fall colors, and how to incorporate them in your home. From major projects – like painting a room – to introducing pops of color through accessories, everyone can enjoy a touch of autumn, even if the AC is still running non-stop. Here are some of our favorites here at The Paint Manager, offered by the experts!  


First up, author Cyndy Aldred, whose blog, The Creativity Exchange, focuses on color, paint and home improvement. Writing for Better Homes & Gardens, she makes the following observations. “Paint colors will continue to warm up this year. Common among the various trend reports are softer neutrals, creamy whites, muted colors, and rich dark hues.”


Although Aldred notes that paint manufacturers and other industry influencers made their pronouncements for the entire year, rather just autumn, the trend toward rich, deeper colors is especially suited for the season.


“Soft neutral paint colors will have warmer undertones this year, which make a space feel cozy and warm.” Aldred writes. “Mixing a soft neutral wall color with a dark or bold accent color in furniture, fabrics, or art is a beautiful way to add contrast to a space.”


Also, look for rich, dark hues – another common thread among the 2018 paint color forecasts. Designers are mixing these colors with whites and soft neutrals to create contrast and make a statement. If you want to be daring but don’t want to risk being overwhelming, choose a dark shade for an accent wall.


According to Aldred, other noteworthy colors are chestnut brown, deep burgundy, and dark blue – which can be used for interior doors, cabinetry and furniture, as well as walls. And consider a combination of rich colors paired with shiny finishes like brass or chrome.


Next, none other than lifestyle diva extraordinaire Martha Stewart, whose website provides idea-inspiring photos of 20 interior settings using fall colors. Overall, Stewart recommends such shades as orange, yellow, dark green, rust and brown as accents. These versatile colors can be used for walls, fabrics, accessories and floral arrangements.


Using different tones of one color help richen the effect, as does layering deep colors and textured fabrics. For example, Stewart picks out a red damask tablecloth, reddish-brown wall color and red lacquer accessories tinted with cinnabar or vermilion as variations on a theme of fall’s signature color.


Reporting on paint color trends for The Spruce, blogger Kelly Weimert identifies “An Abundance of Berries.” Weimert writes: “From strawberry red to raspberry pink to blueberry, well, blue, berry-inspired color palettes are bringing all kinds of vivacious cheer to interior spaces in the upcoming season.


“The beauty of this color trend is its versatility – bolder style sensibilities can select a bright red with which to make a striking style statement while more subdued styles will benefit from a softer raspberry hue to add increased warmth to their aesthetic.”


fall colors, fall home designFor those who prefer a more traditional take on warm autumn hues, floral arrangements are a perfect way to set the tone. Teleflora offers suggestions on its blog post, “Bring Stunning Fall Colors Into Your Home.” They’re all great ideas for those who have come to Florida from locales that actually have four seasons.

  • Decorate the coffee table with candles in seasonal colors and scents; feature a floral arrangement of flowers in fall colors, mixed with leaves (which, of course, Teleflora can supply). Great fall inspired decorations can be found at Furniture.com.
  • Use your imagination to spread small bursts of autumnal color throughout the home. For example, orange roses in small vases in the living room, bright yellow flowers in the kitchen and some deep, ruby red bouquets in the bedroom.


Feeling inspired to invite fall into your home year ‘round with warm colors on your walls?  The Paint Manager has over two decades of experience in providing high-quality, trusted full-service residential painting for homes of every size and age. Our team can provide décor ideas, does all the demanding prep work and performs skilled, meticulous application to ensure beautiful results. Contact us for an estimate.

Seven Top Home Painting Myths You Should Know

Seven Top Home Painting Myths You Should Know


For some reason, there’s no home improvement project that has more mythology surrounding it than house painting. Knowing fact from fiction is essential if you’re planning to do it yourself. If you expected the job to be easy-peasy, reading the following may prompt you to call a professional. Should you still decide to go it alone (or with family and friends), at least you’ll have a better idea of what you’re getting into.


Home DIY, home painting, painting myths

  1. You don’t need a primer – Some people believe it’s important to use a primer, while others think it’s a waste of time, money and energy. The fact of the matter is that if you want to make your walls look smooth, perfect, and professional, you should always apply primer. Moreover, one of the main reasons why using a primer is necessary is because it helps the paint bind well to the wall.


  1. You don’t need to clean or sand the walls if you use a primer – No matter how high-quality the primer, it won’t adhere well to a greasy or uneven surface. Family Handyman notes that you should pay special attention to high-traffic, high-touch areas, as well as kitchens, baths and baseboards.


  1. You always need to apply two coats for a perfect finish – This may have been true in the past, but the quality of paint has improved over the years. If you apply primer, a single coat should be sufficient. However, if you don’t use primer or are applying a lighter shade over a dark color, two coats may be necessary.


  1. Painting the ceiling makes the room look smaller – If interior décor experts are right in declaring that accent walls are no longer trendy, the accent ceiling is on the rise, so to speak. In fact, light walls with a dark ceiling can create the illusion of a taller space. Queen Anne Painting of Seattle expands on this as follows:Home DIY, home painting, painting myths

“… if you paint the ceiling light blue, the room will appear to have a much taller ceiling when in fact, it is the same height it has always been. If you want to avoid the ceiling appearing smaller, be sure you use a medium shade on the walls and a shade or two darker on the ceiling.”


  1. Don’t use dark colors, as it will make a small room appear smaller – Not true at all. A room will look big or small depending on the way you style it, and not on the color you use on the walls and ceilings. The way you light the room, the kind of floor you opt for and the type of furniture you use will determine whether your space looks larger or small. In fact, dark walls can make your room appear larger if you do it the right way. If you have lots of windows, light-colored floors and furniture, a bold color can add to more flavor to your room than lighter shades.


  1. You don’t need to paint your house if you are planning to sell it – If you’re not selling your home as a “fixer-upper,” most buyers are looking for a move-in ready house. Painting your interior walls neutral colors throughout will create a fresh, clean look that will appeal to the majority of homebuyers. Also keep in mind that dingy walls painted in outdated colors may raise a red flag to potential buyers that your home may not have been carefully maintained, and serious problems could be lurking.


  1. You don’t need to hire a professional painting company This depends. Most homeowners lack the experience, expertise and equipment to achieve professional-quality results – not to mention time. Those who are inspired by the numerous home renovation shows on cable TV may think they can tackle the job, but reality could be quite different. If, however, you have a good deal of practical experience on a rehab project or two (and the right equipment), going the DIY route might be successful.


Speaking of house painting professionals, The Paint Manager has over two decades of experience in providing high-quality, trusted full-service residential painting for homes of every size and age. Our team does all the demanding prep work and performs skilled, meticulous application to ensure beautiful results. Contact us for an estimate.

How to Stay Safe When Painting Homes With Lead-Based Paint

How to Stay Safe When Painting Homes With Lead-Based Paint

Lead-based paint is a grave health hazard for not only for homeowners, but also for those who are into home remodeling.

If you live in a house that dates back to 1978 or before, you need to make your home free of lead-based paint. The federal government in 1978 banned the commercial use of lead-based paint, though some states had done so earlier. Lead-based paint – which includes lead-contaminated dust – is the leading cause of lead poisoning.

Lead-based paint is known to have an unhealthy effect on children, especially those under the age of six years. According to a declaration by the Environmental Protection Agency (EPA), lead-based paint ingestion can lead to severe learning disabilities, seizures, behavioral problem, and even death. 

In adults, lead poisoning can cause high blood pressure, and can negatively impact fetus development if women are exposed during pregnancy.

Lead poisoning can also cause such acute conditions as renal failure and encephalopathy.

Traditionally, lead-based paint was routinely used in the painting of home exteriors and interiors. And, the chances of lead-based paint being used increases as the age of your home increases. The Residential Lead-Based Paint Hazard Protection Act was passed by the U.S. Congress in 1992 (also called Title X) to safeguard families from lead exposure from paint, soil, and dust. The EPA, through the Renovation, Repair, and Painting (RRP) Rule, has also directed home remodeling contractors to help control exposure to lead paint.

Putting things in perspective for lead-based paint

It is no doubt upsetting to find out that there is lead-based paint present in your home, but you can work to remove the problem. However, to solve the lead problem, you need to first get to the basics of the issue. And, to understand the basics, you have to know the facts about lead-based paint.

There are millions of homes that still have lead-based paint present, as it typically has been painted over through the years by non-lead-based paint. What you need to understand is if the paint is in perfect shape, you don’t have to worry much about the lead being present in your home. But, do keep in mind that when the lead-based paint starts chipping, peeling, cracking, chalking, or becomes damp or damaged, then the situation turns hazardous, and it becomes urgent for you to resolve the problem.

It is also a safety hazard if found on the surfaces, which your children can chew or those places where there is too much of wear and tear like doors and door frames, windows and window sills, and porches, stairs, and railings. Clean up the dust regularly and make sure to keep the paint in good condition.

Lead dust comes from the deteriorating lead based paint inside your home, or it can also come from the soil from outside your home, which of course is a result of the worsening exterior lead-based paint.

During painting, repair, and renovation activities when paint surfaces are demolished or disturbed, it produces toxic lead dust. This is why you need to hire professionals to do the job.

How to test if your house has lead-based paint

One way to find out is to use a home testing kit for lead. Though inexpensive and widely available, according to the EPA, they are not particularly accurate. Per EPA recommendations, you should look for a lead abatement company to perform the tests.

How to stay safe when repainting a lead-based home

Repainting a lead-based home is a risky proposition, and you need to carefully follow all the guidelines to keep you and your family safe. It is always advisable to hire a professional company to repaint your house if the test confirms that lead-based paint is present in your home. But, if you decide otherwise, there are ways to reduce the risks when repainting a lead-based home.

Encapsulation is the most common and effective way of dealing with the problem – it keeps the paint intact and stable. Encapsulation, as the name suggests is applying a fresh coat of paint on the lead-based paint. This makes sure that the lead-based paint doesn’t find its way into your home.

Make sure that you use a respirator when you are scraping the lead-based paint. NEVER remove lead-based paint without a respirator. Use a vacuum cleaner with a HEPA filter for clean-ups.

Spray adequate water on the surface you are working to keep the dust at bay.

Put on safety gear before you start working on the lead-based paint. Make sure that you cover your eyes, hands, body, and head appropriately – use goggles, gloves, coverall, and hat to stay safe. Also, ensure that you use disposable gloves and coveralls and that you discard them every day. And, don’t forget to wash your goggles on a daily basis.

Always remember to dispose of the lead-based paint surface at a safe location outside your house. Make sure that no one except for those working on the project enters the work area, and seal the non-work areas with plastic sheets.

Why you should call in experts to repaint a lead-based home

Making a home lead-based paint safe is a risky job. Those who have the required experience and expertise can better handle the safety concerns of lead. After all, there is no point in risking your life and that of your loved ones by adopting a DIY approach.

When you hire professionals to repaint a lead-based home, you can rest assured that they will take all the necessary precautions as mandated by the rule of law.

Professionals are not just trained to do their job with perfection, but they also have all the resources (protective gear and tools) to carry out the work safely. They would also make sure that you stay safe while they work.

When you hire professionals, you don’t have to worry about toxic waste disposal. Lead disposal is a risky job. They know how, where and when to safely dispose of the lead-based waste.

The Paint Manager is experienced in making Central Florida homes safe from the hazards of lead paint. We are a full-service painting company in Orlando delivering quality work to residential and commercial customers. Call us today to schedule an appointment.

How to Hire a Professional Painting Company

How to Hire a Professional Painting Company

A nicely done up office space or building speaks volumes about the taste of the commercial establishments it houses. It not only creates a stunning first impression on people who see and visit the space, but it also increases the curb appeal of your commercial building. Around the world, commercial spaces look stunningly beautiful because professionals paint and/ or refurbish the interior and exterior of the building. The same is true if you are in this part of the world, namely Orlando. Even you should hire an experienced commercial painting company that infuses life into your building.

To attract customers to your commercial establishment, you need an attractive exterior and an exquisite internal décor. Commercial painting is a specialized field, and not everyone out there in the market is fully equipped to do the job with perfection. Things can horribly go wrong if you don’t hire an experienced commercial painting company.

You might think that hiring a commercial painting company is a cake walk, but the reality is different. Looking for a commercial painting company is not all that easy a job, you have to carefully weigh your options and do some research on your own to find the best professional painting company.

If you own a commercial space in town and are interested in making it an attractive investment destination, then you are at the right place.

6 Things to Consider When Hiring a Professional Painting Company

There are many companies in the market who claim to be commercial painting experts. So, how do you differentiate between a company that is genuine from the one that is not? It is always advisable to start the process by doing some research on the internet.

The first thing that you have to keep in mind while looking for a commercial painting company is the quality of work they deliver. Secondly, find out about the painting company’s standing in the market. And, finally try to assess whether they stick to what they say. After all, you need to trust the company that would renovate your commercial space.

You should start your search by asking your friends, family and/ or colleagues to recommend a commercial painting company in town. Any recommendation that comes from your near and dear ones is worth considering because only a satisfied customer would recommend someone.

  1. Should have sufficient experience – Nothing can replace experience. The first thing that you need to do is find out how long the commercial painting company has been in the business. Inexperienced companies can do more harm to your commercial property than doing any good. You would also not want to hire a fly-by-night operator. Hence, make sure that the commercial painting company has a minimum standing of three years or more in the market. The more experience the commercial painting company has in the market the better is the result you can expect. Businesses that have been there in the market for long are more likely to paint your commercial space with perfection.
  2. Expertise and knowledge – It is important to find out whether the commercial painting company you are planning to hire has sufficient knowledge, adequate expertise and the required exposure. In fact, the company should have a team of highly skilled painters who can do the job with perfection. They should have adequate knowledge about all the latest products and modern painting techniques. A professional painting company would also make sure that their prep work is properly done. The painting contractor should also know the latest trends, finishes, and colors that can make your building stand out in the crowd.
  3. Always ask for referrals – Any commercial painting company worth its name in the market would not hesitate in providing references. Speak to at least three references to find out the track record of the company you plan to hire. Never think twice about speaking to the references. After all, it is your right to find out that the company you are hiring is trustworthy, experienced and hard working. You can also visit the website of the company you are planning to hire and go through the testimonials. This would give you a fair bit of idea about the standing and reputation of the company.
  4. Find out whether they have their own employees or are they subcontractors – This is an important one. You need to find out whether the commercial painting company you are planning to hire employ people directly or are they subcontractors. Direct employees of the company are covered for compensation and general liability insurance by the employer. But, if they are subcontractors, then you need to make sure that they are separately insured. Either way, the commercial painting company should give you proof of employee’s insurance details.
  5. Make sure that the company has a valid license to work – This again is an important consideration. Make sure that the commercial painting company you are planning to hire has a valid state issued license. Any reputed company will always have a state license, employees’ compensation insurance and general liability insurance. It is important that commercial painting contractors protect their employees. If the commercial painting company you are planning to hire is unable to show you the required documents, then don’t waste your time just move on.
  6. Always ask for guarantee – Find out if the commercial painting company you are planning to hire offers guarantee or not. Usually, paint manufacturers guarantee their products, but commercial painters worth their salt would also give warranty on the prep work they do. Make sure that you have everything in writing, all the promises, guarantees, and warranties.
  7. Do find out the total cost – This is again important; you need to know how much you have to pay. But, do remember that price should never be a limiting factor. If you hire a professional, licensed, hard-working, trusted, and reputed commercial painting contractor, then their rates would be higher than those who do not have proper paraphernalia, skilled workers, and/ or experience. However, looking at the larger picture is the key when you plan to hire a commercial painting company. For a lasting result and a stress free experience, you need to hire a contractor that is insured, licensed and has enough experience of delivering high quality work on a consistent basis. This should be your primary concern rather than just the rates.
  8. Finally ask for a written estimate – Make sure that you ask the contractor to give a written estimate for all the work that they plan to undertake. Nothing should verbally be agreed upon, ask for a written estimate. You need to know the material the contractor would use, the kind of prep work they will do and the time they need to finish the project. Ask the contractor for a written contract, and not something scribbled on the back of his or her card.


If you are based in Orlando and are looking for a commercial painting company, just get in touch with The Paint Manager. We have over 18 years of experience in the commercial painting industry. From big to small, we have undertaken projects of all sizes and completed them to the satisfaction of our customers.

The Paint Manger is a trusted name in the commercial painting market. We are a full-service painting company in Orlando having the requisite experience and expertise to deliver quality work.


Go Top
Skip to toolbar