What Is A Move-in Ready House?

What Is A Move-in Ready House?

If you’re a fan of home-buying cable TV shows, you’ve doubtlessly heard the term “move-in ready house.” But if you’re about to hunt for a house yourself, this description has an even more urgent need to be definitely defined. And what if you’re selling your house? Can you correctly claim that it’s move-in ready?

This term is often bandied about with the assumption that everyone knows what it means. However, your concept of a move-in ready house may differ from someone else’s. Fortunately, there are standards for what constitutes a house in this condition. We thank the experts at realtor.com, Homebuyer.com and Rocket Homes for providing the following valuable information!

What Does Move-in Ready Mean – and Not Mean?

Basically, move-in ready means the house should be livable without any anticipated repairs.

“A move-in ready home should not require anything that would prevent a buyer from occupying the home immediately without a to-do list,” says Jennifer Okhovat, a real estate agent at Compass in Los Angeles.

The legal definition of a move-in ready home is a home that’s suitable for immediate occupancy and meets the local government’s safety, health, and building codes standards. Buyers of a move-in ready home can expect the home’s major systems to be functional and certified by a licensed home inspector – including electrical, plumbing, and HVAC – and for its structure to be sound. Move-in ready homes have no known hazards and no building code violations.

The three general traits of a move-in ready home are as follow:

  • Structurally sound and safe.
  • Plumbing, electricity, and windows and doors are operable.
  • Free from pests and infestations.

Our blog post – “What to Look for Before You Buy a Home” – provides a guide on how to take stock of a home’s condition and state of repair – including a list of main exterior and construction components you (and a home inspector) need to examine closely before making an offer.  

Sometimes, homebuyers have unrealistic expectations of “move-in ready” – which may be the fault of those afore-mentioned TV shows where prospective buyers are critical of outdated light fixtures, non-stainless steel kitchen appliances, popcorn ceilings, etc. As long as everything is in working order and up to code, there’s no reason why you can’t sign the contract and move right in. A house in which the flooring, cabinetry, finishes, trim, paint colors, etc., aren’t to your taste isn’t the same as a house in need of repairs – such as a new roof, a hole in the drywall and so on.

As realtor.com notes, “So even if that Tuscan wine-themed backsplash in the kitchen is giving you nightmares, it doesn’t mean the home is unable to be lived in.”

Eight Features of a Move-in Ready House

Now that you know “move-in ready” isn’t synonymous with “updated,” a move-in ready house meets the following eight standards:

  1. Working plumbing and pipes – Running water is a top priority for any home. The drains of a move-in ready home will be clean and clear of blockages, and faucets will provide clean water.
  2. Modern electrical outlets and wiring – Move-in ready homes meet the national electrical code. Every kitchen, bedroom, living space and family room will have a working electrical outlet. Outlets will be spaced according to electrical standards and not near running water.
  3. Leak-proof roof and exterior – The roof of a move-in ready home will be free from major and minor damage – including leaks, loose shingles and discoloration. In addition, gutters and drainage systems will be intact. The home’s interior will show no evidence of water damage from failed roofing. For homes with siding, all siding pieces will be structurally sound. For brick homes, all tuckpointing will be up-to-date and complete.
  4. Major appliances are included – Move-in ready homes will include refrigerators, stoves, dishwashers, and washers and dryers. Appliances are not required to meet energy-efficiency standards and may be near their replacement age.
  5. Flooring and walls are level and flat – The floors of a move-in ready home will be level, and its walls will be even. There will be no apparent holes, water stains, or physical warping. Moldings around doors and windows will be aligned. Doors and windows will open and close as expected. There will be no gaps between ceilings and walls and floors.
  6. Windows and door locks operate – The windows and doors of a move-in ready home will have secure locking mechanisms. Single- and double-pane windows will lock from inside the house. Exterior doors will have functioning double-locking mechanisms. System memory has been wiped before move-in for homes with biometric key systems.
  7. Heating and cooling systems are functional and tuned – Heating, ventilation and cooling (HVAC) systems will have new filters, clean vents and working fan belts. Refrigerants will be at acceptable levels, and there will be no evidence of pest infestation.
  8. The home is habitable – A move-in ready home will have a certificate of occupancy and adhere to the applicable building codes.


Is a Move-in Ready House Right for You?

Many homebuyers prefer a house that has no major projects requiring immediate attention. The convenience of moving right in and resuming a regular schedule – or getting oriented to new surroundings and creating a new regular schedule – is highly desirable to them. Even those who eventually want to update the light fixtures and repaint the family room may appreciate the fact that they can do so at their leisure, on their own schedule and according to their budget.

As Rocket Homes observes, “Home improvement (and moving in general) isn’t for the faint of heart. If you aren’t up for the physical challenge of renovating and repairing a home – or the mental challenge of coordinating contractors – you’re better off looking for a house that’s habitable and suits your needs as-is.” Moreover, it’s typically easier to get financing for a move-in ready home than for a home improvement mortgage or construction loan.

However, others welcome the opportunity to “make the house their own,” to use the phrase often heard on home-buying TV shows. For them, a house that has no issues isn’t as important as one that can be remodeled or renovated to become their dream home. The “bones” of the house, architectural style, number of rooms, certain amenities or even the neighborhood could be the deciding factor. For example, home buyers who have their heart set on a Victorian, craftsman bungalow or mid-century modern house are typically willing to put the work – and money – into getting exactly the house they envision.

Ultimately, choosing a move-in ready house is a matter of preference. Knowing yourself, the needs and expectations of your family and your long-term plans should guide you to the right decision. After all, your home isn’t only your most important investment – it’s where you make a life for yourself and your family. Choosing the right house enhances the quality of your life and allows you to create wonderful experiences and memories.

Even a move-in ready house will need maintenance to keep it in top condition – and those requiring exterior/interior paint and repairs need a reputable, reliable contractor. Fortunately, The Paint Manager is here to help you maintain, repair and improve your home! We have been serving Central Florida homeowners for more than 20 years with experienced, dedicated and professional services that include exterior and interior house painting, roof repair and cleaningdrywall repair, popcorn ceiling texture removal, cabinet refinishing and so much more!

Plus, become a member of The Paint Manager to receive a 15% year-‘round member’s discount. Contact us to learn more about our services and membership discount offer. We look forward to meeting you!

How to Paint or Stain a Wood Fence

How to Paint or Stain a Wood Fence

Every homeowner wants their house to be beautiful. But for those who have a wood fence, there is sometimes a tendency to neglect its appearance. Whether your property is a small city lot or an acre, a wood fence comprises a substantial amount of surface to maintain. However, it’s not only a matter of improving curb appeal, but keeping up your wood fence with a fresh coat of paint or wood stain improves its condition and extends its useful life.

While fences are not subject to as much wear and tear as a deck, for example, Central Florida’s intense sun, summer heat, heavy rains, and insects (in fences made of untreated wood) take their toll over time. According to HGTV, experts recommend repainting or restaining every two to three years, but a better way to determine your need is to check for beading. On a stained and sealed fence, if water no longer beads up on the surface, but instead soaks in, it may be time. Check painted surfaces for cracks, chips and wear.

Painting or staining your fence may not be high on the list of home maintenance chores you look forward to, but being proactive and not waiting until it’s the neighborhood eyesore will make the task easier.

On the other hand, you might be an eager do-it-yourselfer ready to tackle the challenge! Whatever the case, knowing which option is better for your fence – as well as the proper technique for preparation and application – will produce the great result you want. So let’s start at the beginning!

Making the Choice between Painting or Staining Your Wood Fence

There are a few factors to consider in making this decision. If your fence is new, you literally have a blank canvas to work with. However, keep in mind the following:

The architectural style of your house – Traditional-style homes are better complemented by a painted fence. Think of the classic white picket fence of a bungalow, cottage or Colonial style home. Contemporary and rustic-style homes are usually set off better by a stained fence.

Your homeowners association (HOA) – If you live in a community with an HOA, there are typically strict regulations regarding exterior house colors. Check before choosing to be sure you comply. Don’t risk staining when paint is required for fencing – or vice-versa – and confirm which colors are permitted.

If – as is more common – you’ll be repainting or restaining – you could see this as an opportunity to go in a different direction. But the reality is that painting over stain is somewhat easier, as doing the opposite requires stripping the paint and prepping the wood to accept stain. So to some degree, the existing treatment determines which you’ll use. That being said, the following are the advantages and disadvantages of each:

Painting a fence As Matt the Painter notes, one of the biggest benefits of paint is its variety. Paint comes in many colors and finishes. As a result, you have more room to be creative with the presentation of your fence. You can opt for a matte or glossy finish to add to the aesthetic appeal of your house. Still, be aware of neighborhood standards. If surrounding homes have that sweet white picket fence, think twice about choosing an over-the-top color. As another plus, paint dries faster than stain, which can come in handy if you are on a tight schedule.

However, using paint has its share of disadvantages. Paint can be expensive, which will push your budget higher. Since it requires a primer as a base and multiple coats to properly cover the fence, you are likely to require a higher quantity of paint to complete the job. It is also less durable than a stain and can chip under extreme weather conditions.

Staining a fence Staining a fence can be a great option if you are looking for durable coverage, as stain absorbs into the wood. As a result, it lasts longer and is not at any risk of being washed or chipped away. Fence stain is also significantly less pricey compared to paints. Therefore, if you want a budget-friendly solution to protecting your fence, staining should be your choice.

One possible downside is that staining your fence offers fewer options in terms of colors or textures. Stains are typically available in natural colors. Again, this can be an advantage if your home is more modern or rustic in style, or located in a wooded area with plenty of trees. In addition, a fence stain takes a longer time to dry and can be inconvenient if you are in a rush to complete the project due to time or weather conditions.

So, if you are looking to enhance the aesthetic value of your fence and don’t mind spending a little extra, painting it would be the better option. However, if longevity and a budget-friendly price are your primary concerns, you should opt for staining your fence. In either case, use a high-quality paint or fence stain that is UV-resistant for long-term protection against the elements.

Whether you choose to paint or stain, newcomers to Central Florida need to be aware that the months of June through August are known as “rainy season” or “monsoon season.” As you can expect almost daily afternoon thunderstorms, avoid any exterior paint or stain job during that period. Late spring and mid-fall present more favorable weather for such projects. Even then, pay attention to the projected weather forecasts while planning!

Preparing the Fence and the Surrounding Ground

As is the case with any paint (or stain) job, preparation is key to achieve the best possible result. True Value offers the following advice:

  • Clean the surrounding area: Remove leaves, grass or weeds along the base of the fence by mowing, raking, weeding by hand or spraying a weed killer. Place a drop cloth below or next to the fence to catch debris or dripping paint.
  • Prepare the fence itself: Clean, scrape and sand your fence with medium-grit or fine-grit sandpaper. You may want to use a pressure washer to clean the fence and blast off loose paint. You can also use a garden hose with a power nozzle, a scrub brush and a solution of detergent and water. Use a paint scraper to finish removing remaining loose paint, then use a power sander to blend any raised paint edges into the surrounding areas. Sponge any mold or mildew spots with a 50/50 solution of bleach and water to keep mold or mildew from growing back. Also be sure to check your fence for termite or insect damage. If you find insect activity, replace the damaged wood.
  • Safety first: Always wear gloves and a face mask when sanding and working with toxic chemicals – even when outdoors! If using a paint sprayer, wear safety glasses and a dust mask or respirator.

Fence Painting Techniques for a Beautiful Result

If you are the proud owner of a house with a fence in Central Florida, using the right application techniques for paint or stain can help set off your property to perfection!

Applying paint with a roller or paint sprayer are options. If you choose a sprayer, use an airless model or rent a high-volume/low-pressure (HVLP) sprayer for greater control with less overspray. Use a paintbrush to catch drips and work paint into hard-to-reach areas. If you are opting for staining, use a stain brush, which holds more finish with less dripping.

HGTV provides the following application instructions. However, be sure to follow manufacturer’s directions for use, as well as precautions.

  • Pour your coating into a bucket and mix thoroughly. Using a wide nylon or polyester brush (4-6 inches), begin dipping the brush into the paint and applying the coating. For best results, begin with any top trim or horizontal structures.
  • Paint the vertical pickets, working from the top of the fence to the bottom. If using a roller, back-brush every couple of feet to ensure even coverage and avoid lap marks. If you are using a paint sprayer, work in the same method, but stop every few feet and use a wide brush to back-brush. This will prevent lap marks and better help absorb the coating into the surface. Continue in this manner until the entire surface is covered. Allow to dry completely, then add another coat, if necessary. Once you’re finished, remove any masking tape and the drop cloth.
  • Allow to dry completely, then add another coat, if necessary. Once you’re finished, remove any masking tape and the drop cloth. 

Now for the big question – should you do it yourself, or call a professional? As our blog post – “How to Paint a Wrought Iron Fence” – covers, those who have proven DIY experience may feel confident enough to take on this project. For most homeowners, however, leaving it to a professional painting contractor is well worth the investment. A professional has the experience and skill, as well as the proper supplies and equipment to get the job done right and safely.

Our team at The Paint Manager has been proudly serving Central Florida homeowners for more than 20 years with experienced, dedicated and professional services that include exterior and interior house painting, roof repair and cleaning, drywall repair, popcorn ceiling texture removal, cabinet refinishing and so much more!

Plus, become a member of The Paint Manager to receive a 15% year-‘round member’s discount. Contact us to learn more about our services and membership discount offer. We look forward to meeting you!

Making Home Improvements? Don’t Forget the Garage!

Making Home Improvements? Don’t Forget the Garage!

Consider the garage. While most homes built since the 1940s have a garage integrated into the house, or a detached garage, it is too often neglected when other rooms or areas are improved. You may have an upgraded kitchen with granite countertops and the latest appliances, but the poor garage remains a chaotic catch-all. It’s time to change that, and give your garage the attention it deserves! The payoff will be a space that’s better organized, more functional and may even allow you to park your car there! Don’t laugh. One in four Americans admit their garage is so full and cluttered it can’t accommodate a car.

Whether you want to make improvements for your own benefit or to better attract prospective homebuyers, investing in your garage need not be expensive (certainly not as much as a kitchen or master bath). According to Kiplinger, 85% of buyers look at a garage from a storage perspective. Adding storage solutions like shelves and cabinets in the garage can be a selling point. A clean and tidy garage will also make a good impression that conveys the house is move-in ready.

Increase Storage and Improve Organization

Garage Living offers good suggestions for increasing storage. The company – which specializes in garage renovations – recommends PVC slatwall panels for one or more walls. A slatwall paneled wall can get such items as tools, cables, ladders, brooms, lawn care implements, hoses, etc., off the floor and within easy reach. Wire baskets that hang from the wall can store cans, bottles and other items that tend to be stacked on the floor or on a counter. Slatwall also creates a neat, “built-in” appearance that visually elevates the garage.

Utility shelving is another option that could be a more economical and/or practical solution that eliminates the need for installation, which slatwall requires. Freestanding metal shelving units are available in a wide variety of sizes, providing numerous possibilities for flexible storage adaptable to your changing needs. Overhead metal storage units are ceiling-mounted to increase storage even more, while leaving plenty of clearance for your vehicle(s).

However, be sure to buy the right shelving unit(s) for the job! If you’re storing heavy, bulky items – such as equipment, tool bins, etc. – you need a heavy-duty unit. Choosing a lighter-weight unit to save money is false economy, as it won’t support the items and can collapse or topple over. Visit the websites of home improvement centers to see what they offer. Their shelving unit page will feature guides that can help you choose the appropriate unit based upon weight capacity per shelf, depth, height, material and price – so you can stay within budget but be assured of getting a unit that’s up to the task.

Speaking of budgets, those who have more money to spend on upgrading the garage can add a custom cabinet system. This option requires hiring a company specializing in garage makeovers. Selections typically include modular storage, semi-custom or custom-fit cabinet systems. Speciality companies offer a wide variety of colors, styles and component design combinations. Unlike kitchen cabinetry, cabinet systems designed for the garage are built of steel or other durable materials for the cabinets and countertop, while keeping attractive design in mind. Needless to say, the sky’s the limit when it comes to the possibilities for a custom solution – as well as the price! Quality cabinet and storage systems are also sold at home improvement centers, but require you to assemble and install them yourself. Although not inexpensive either, they are priced below custom cabinetry.

Wall-mounted storage systems make optimum use of space while offering clean design. Although pricier than freestanding cabinets, they’re a definite aesthetic upgrade that will make the garage a better place to work and move about, and may ultimately make your home more attractive when it’s time to sell.

Freestanding cabinets in steel or plastic are the most economical of cabinet storage solutions. In addition to price, their advantage is the ability to be placed wherever a cabinet is needed or wanted. These cabinets are typically easy to assemble without tools.

If you haven’t noticed, we here at The Paint Manager are very safety-conscious. Items stored and/or stacked on top of one another on the garage floor are a tripping hazard, while items propped against the wall could fall over, causing injury or damaging your car. In addition, equipment that’s stored improperly can become damaged. Having a place for everything and everything in its place is essential to a safe, functional garage!

Upgrade the Garage Floor for a Showroom Look

Most homeowners give up on the garage floor, ignoring oil stains and the irregularities inherent to unfinished concrete. After all, if you do park your vehicle(s) in the garage, who will notice the floor, anyway? However, if you’re upgrading your garage, you need to include the floor!

Applying an epoxy finish is a popular way to give the garage floor a little extra panache – as well as sealing the floor, protecting it from stains and giving it a high-performance, smooth, durable surface that can last for many years. Our blog post – “Advantages of Epoxy Floor Finishes” – covers the many benefits it offers. The epoxy finish can be clear, or customized with specialty colors or decorative chip blends to mask concrete flooring cracks – or just for aesthetic effect.

While this may seem like an easy DIY project, applying epoxy is for those with experience in similar home improvement efforts, not absolute beginners. Not all concrete floors will hold an epoxy floor coating, and preparing concrete for the project can be labor intensive and tedious. Should this be the case, hiring a professional services company – such as The Paint Manager – is recommended.

As to be expected, companies specializing in garage makeovers offer floor coatings they claim are more durable and chemical-resistant than epoxy, and quicker to cure (harden) – which means the garage can be used within 24 hours, instead of the three-to-four days needed to apply an epoxy floor coating. Depending upon the company, several types of concrete coating systems are available, each providing a different textured finish. Options become more expensive subject to the materials incorporated into the coating system.

A Little Paint Goes a Long Way

Like the concrete floor, garage walls are often neglected. Painting them will provide an immediate lift to the garage’s look and the impression it makes on potential buyers, if you’re planning to put your house on the market. Even if your improvement plan includes cabinetry and shelves that mostly cover the walls, a fresh coat of paint will make the space look new and finished. Choose white or another neutral color and – of course – clean the walls first if they’re dirty or stained, and be sure they’re dry before painting.

The Take-Home Message

It’s counterintuitive to have a home that’s well-maintained inside and out, yet step into a dingy, neglected, cluttered garage. Giving the garage the attention it deserves can transform it into an attractive, safe and functional space that increases your home’s value.

Our professionals at The Paint Manager have the experience and skill to perform a wide range of home improvement and maintenance tasks. If you need help achieving your vision for your garage – including ideas for maximizing its usable space – contact us! We have served Central Florida since 2000 with quality professional residential and commercial painting services. Visit our website to learn about the many other services we provide – including pressure washing, roof cleaning and stump removal. Become a member of The Paint Manager to receive a 15% year-‘round member’s discount. We look forward to meeting you!

Must-Haves for a Homebuyer

Must-Haves for a Homebuyer

When you plan to sell your house, you want to get the best price possible. But you may not get the price you think you deserve. Why? The truth is, today’s homebuyers are looking for specific features and amenities – and if your house falls short of their expectations, it will sit on the market for longer than it should, or you won’t get top dollar – or both! This may come as an unpleasant surprise if you’ve lived in your home for many years and have maintained it yet not made any significant updates. Here’s a look at what homebuyers look for in a home – and what yours should have if you expect it to sell at best market value!

Thinking About Selling Your House? Make Sure it Has What Homebuyers are Looking For!

Ever watch those popular home buying shows on cable TV and assume that much of the house hunters’ criticisms are exaggerated? Are homebuyers really so picky? Is a popcorn ceiling a deal-breaker? Actually, yes! Our blog post – “Should You Replace Your Home’s Popcorn Ceilings With a Smooth Surface?” – covers this question, and concluded that it’s recommended if you’re planning to put your house on the market!

Of course, that’s only one example of a feature you think may not matter to a homebuyer, but stands out to them like that proverbial sore thumb! While some people do welcome a “fixer” that they can renovate to their taste, most prefer a move-in-ready house. Younger buyers, in particular, are generally too busy with families and jobs to devote the time to the upheaval that remodeling projects involve – not to mention the expense. At the other end of the continuum, empty-nesters looking to downsize want to simplify their life, rather than take on home improvement projects.

Top Features that Homebuyers Want

The good people at Gulf State Homebuyers and Bankrate offer the following list of in-demand features:

Open Floor Plans – This trend has been holding steady for quite some time. Open floor plans give families more freedom to use space as they see fit while also allowing them to stay close and connected. By removing the walls between the kitchen, living room, dining room, and/or other parts of the house, people can move freely throughout. Mothers, especially, like being able to keep an eye on their children’s activities from the kitchen and main living areas.

Hardwood Floors – Hardwood floors are one of the most desirable features a home can have. People love the timeless beauty of wood and appreciate its durability and easy maintenance. It is definitely a luxury that is expensive to install, but can add up to 2.5% to a home’s sale price. This makes the upgrade a good investment if it’s time to replace your current flooring. If replacing your carpeting with hardwood flooring is too expensive despite the high projected return on investment, consider installing a high-quality laminate.

Fully Renovated Kitchen – This trend is based on where people spend the most time in their home – and the kitchen usually tops the list. Homebuyers continue to be focused on homes with beautifully upgraded kitchens, which can help maximize the value! Upgrades can be as simple as a matching set of new appliances (stainless steel, of course), but buyers are more drawn to completely remodeled contemporary kitchens with features like granite or quartz countertops, hidden or pullout storage for utensils and large pantries. Kitchens designed to eat in with large center islands fetch the highest sale price because they eliminate the need for a formal dining room. Keep reading to learn which updates you can make that won’t break the bank!

En suite master bathroom/upgraded bathroom – Homebuyers seek spa-like master baths that are part of the master suite – as well as stylish bathrooms and powder rooms. Again, older homes may not have this amenity, and adding a master suite is not likely to be cost-effective for most. Keep reading to learn how you can update your bathrooms to make the most of what you have!

Home office Many people now work from home, and the trend is only going to increase. If your house has more than two bedrooms, staging (furnishing) one as a home office may be beneficial in showing potential buyers its potential.

Projects To Do Before Selling That Will Add Value

As previously mentioned, making major renovations may not be practical for your situation. For example, a full kitchen renovation can increase your home’s value, but you may not be able to fully recoup the amount you spent. Make sure that improvements will be cost-effective and allow you to compete with “comps” – that is, the selling price of comparable properties in your neighborhood. Calculate your costs carefully and plan your projects wisely!

Writing for Bob Villa, Manasa Reddigari offers recommendations for home improvements to add value to your house when you sell.

Paint the interior – A fresh coat of paint throughout gives every room an immediate lift, and sends the message to buyers that your home is well-maintained. It creates a major positive first impression that will give the rest of your house a “halo effect.” Choose light, neutral colors, and avoid details that are too taste-specific. Bold colors may express your individuality, but you’re trying to appeal to as many potential buyers as possible. Better to give them a blank canvas in order for them to visualize how they can make it their own. Our blog post – “Seven Top Home Painting Myths You Should Know” – includes topics of special importance to home sellers.

Replace the roof – According to the National Association of Realtors, when a buyer has to choose between two homes of similar size and features, they will opt for the one that has a newer roof. The report reveals that 33% of home sellers said that a roof replacement helped them close the deal. If your roof is new (or relatively so), make sure it’s clean!

Replace the garage door – Real estate agents (16%) recommend replacing the garage door, which can also improve security while increasing curb appeal. Generally, you can recover 95% of your project cost. Depending upon the type of door, however, it may need to be painted. Even if you have an extra can or two of exterior paint from the last time your house was painted, paint eventually fades (especially under Florida’s intense sun), and there is a possibility it won’t match. The best time to replace the garage door is just before you paint your home’s exterior.

Replace the front door – A weather-beaten entry door that’s seen better days won’t give homebuyers a warm welcome. The same advice as given for when to replace the garage door applies here, as well. While a front door should be a different color from that of the house, a new door on a house that needs repainting won’t have the intended effect. Steel or fiberglass doors offer good looks and durability, and you could recover upwards of 70 percent of the project’s cost when you sell.

Upgrade your kitchen fixtures and features – Kitchens sell houses, so take a close look at what you can afford to invest in improvements and do as many as possible while staying within your budget. However, even basic improvements can stretch your budget to its limit. Paint your cabinets (if possible) and update them with new hardware if you can’t justify replacing them. Our blog post – “Cabinets – Don’t Replace, Refinish!” – covers what’s involved with staining wood cabinetry. Also look into installing new plumbing hardware (and possibly a new kitchen sink) and lighting fixtures.

Renovate your bathroom – As previously mentioned, a complete bathroom renovation can be a costly exercise. However, some small changes can make a great deal of difference. For example, replacing the sink vanity, replacing faucet sets and lighting fixtures can go a long way. HomeBNC provides many inspiring – yet budget-friendly – ideas for giving your bathroom a fresh look that can catch a homebuyer’s eye.

The Take-Home Message

We’re approaching the peak time of year for selling and buying homes, so if you’re planning to put yours on the market, start thinking seriously about making the improvements necessary to achieving the best possible selling price.

As you’ve learned, getting your house ready to put on the market can be expensive – while finding an experienced, reliable and trustworthy professional for home improvements projects can be challenging. Fortunately,  The Paint Manager is here – and has been dedicated to serving Central Florida homeowners and business owners since 2000! At the present time, our professional contractors are only available for exterior jobs. Of course, we will let our valued members know when we are again able to provide our full range of services. As always, we appreciate your support! Feel free to contact us to schedule an appointment or ask questions, and stay safe!

Sandblasting 101: How to Prep Your Home & Get it Done Safely

Sandblasting 101: How to Prep Your Home & Get it Done Safely


Preparing your house or other structure for repainting is essential to achieving a smooth, clean surface to which the paint will adhere properly for an even appearance and long service life. For homes that have several layers of exterior paint that’s cracking, peeling and gatoring, slapping on another coat of paint is counterproductive. And removing the old paint manually through scrapping just isn’t practical. In such a situation, sandblasting – also known as abrasive blasting – is the only solution.

Sandblasting is the process of forcibly propelling a stream of abrasive material against a surface under high pressure to clean, smoothen, or roughen up a surface. The common name is actually a misnomer, as many types of materials can be used. While some homeowners try to go the DIY route, this is really one job that should be left to the pros, as it poses serious health hazards for amateurs – who aren’t likely to own the proper protective gear or know proper technique.

However, we’re aware of professional or aspiring house flippers who have good hands-on skills out of necessity. The properties on which you can get a good deal typically aren’t in great condition. Here’s a basic guide to economical sandblasting that keeps safety front and center.


The cost of sandblasting a house

Cost varies, depending on the size of the project, construction material of the structure and abrasive material used. The cost of the sandblasting project increases with the increase in the size of the area and the increase in the difficulty to remove the material.


Safety considerations

While many other abrasive materials are now used, silica sand remains popular. Silica is a mineral compound called silicon dioxide which is in crystalline or amorphous form. Crystalline silica is hazardous to health. It is usually found in quartz, but also found in substances like tridymite, cristobalite and tripoli. Inhaling crystalline silica dust can cause silicosis and various other diseases.

In 2016, the Occupational Safety and Health Administration (OSHA) issued a directive to control exposure to respirable crystalline silica. The rule comprises of two standards – one for Construction Code of Federal Regulations and the other for General Industry and Maritime.

For respiratory protection, wear a respirator approved by the National Institute for Occupational Safety and Health (NIOSH). This should cover the head, neck and shoulders.


Other protective gear should include the following:

  • Protective helmet
  • Protective clothing, including gloves
  • Safety shoes or boots
  • Ear protection


How to prep your home for sandblasting

Many Central Florida homes are concrete block construction – known in the trade as concrete masonry units (CMUs). Concrete block homes may be painted or stuccoed over. Test-blast a small area before proceeding. The type of paint (ordinary latex or elastomeric paint) and the number of coats will determine how difficult it is to remove. The closer and longer you blast the block, the more cement and aggregate you are likely to take off from the surface.

You need to be careful when it comes to the mortar between the block, particularly the vertical joints which are also called head joints. The mortar can blow out, which creates openings called bee holes. These openings act as entry points for insects and water. Patch these holes with fresh mortar, which is known as tuck pointing. Professionals are recommended to do this job, as staining and an imperfect appearance can result when improperly done.

To protect windows, cover them properly. Masking tape and red and grey tape are not usually the right option. Experts recommend using clear six mil plastic sheeting to cover windows. Use one sheet per window, double tape it continuously all around. Cover all doors that are not to be sandblasted to protect them from debris.

Also, make sure that you don’t blast stucco or CMU dry. Also ensure that you don’t sandblast a surface if there is a chance that there is asbestos or lead in it. If there’s a question about this, have the paint tested. If so, it definitely will necessitate removal by a professional.

You should also use a high-pressure sprayer, not just the hose, after sandblasting to remove sand and masonry grit. You also most likely will have to clean up the wet abrasive material around the area where sandblasting is done.


As we said at the beginning, if you’re not an ambitious house flipper or DIY-seasoned homeowner, sandblasting is best left to those with the experience, skills and equipment.

Our pros at The Paint Manager can carry out sandblasting efficiently and safely. Contact us to learn more.


How to Paint Your Baby’s Nursery

How to Paint Your Baby’s Nursery

Nothing is more exciting than welcoming your baby into this world. All kinds of preparations are underway – from making a list of names to shopping and sprucing up your home’s exteriors and interiors – as parents leave no stone unturned to give the best to their new arrival. The major preparation is, of course, decorating the nursery – which starts with choosing the wall color. While choices have fortunately expanded beyond pink for girls and blue for boys, there’s much more to consider that can have a long-term effect on the health of your newborn.


Start with a healthy environment

To make your baby’s room healthier, Consumer Reports offers some tips that you need to keep in mind before undertaking the painting project:

Use paint that has low or zero volatile organic compounds (VOCs) – VOCs are solvents that are released into the air when paint containing these compounds dries. According to the American Lung Association, breathing VOCs can irritate the eyes, nose and throat; cause difficulty in breathing; nausea; and can damage the central nervous system as well as other organs. Some VOCs can cause cancer. Not all VOCs have all these health effects, though many have several. Details on specific health effects of each specific VOC can be found in the Agency for Toxic Substances and Disease Registry Toxic Substances Portal.

Paint the nursery at least two months in advance – This is a good general rule, even when using paint containing low or zero VOCs – as all interior paints give off some fumes.

Check for the presence of lead-based paint – Homes built before 1978 often contain lead-based paint. If there is no chipping or peeling of the paint on the wall, windowsills or doors, it doesn’t mean the environment is safe. Intact paint can be dangerous – especially on windows and doors – because they generate lead-contaminated dust when they are opened or closed. If your home has lead-based paint, do not attempt to remove it yourself. Hire a licensed contractor for removal, and find other accommodations during the mitigation process until it is determined safe for you to return.


Getting down to work

If you’re considering taking the DIY approach to painting the nursery, the good people at Ecos Paints outline the process as follows.

Understand the effect of colors on space – Dark color schemes can make your room look more cramped, whereas light colors like white can make it appear more spacious. Different color schemes can also have a bearing on your baby’s mood. For instance, research claims that red color can increase the feeling of aggression, whereas yellow color can pep up the mood. Also, some soothing colors are known to help your baby sleep better. The best way to select a color for your baby’s room is to view how it would look on the wall. You can get sample colors, and then choose the best for your baby’s nursery.

Determine the amount of paint you need – The quality of paint and the area of the room you have to paint (square foot) are the two things that will determine the amount of paint you need to paint your baby’s room. For example, to paint an average sized room (two coats) you would need about five gallons of average quality paint, but the same can be painted in three gallons if the paint is of premier quality.

Take into account the durability of the paint – The paint finish you choose is what would affect the durability of the paint. For instance, if you want moisture resistant and washable paint, you can choose eggshell finish. For a high traffic area, you can either choose eggshell or some other pale to mid color because they are less prone to marks from rubbing. If you use matte paint, on the other hand, it can hide the imperfections in the wall.

Do the necessary prep work – Before you start the project, you should ensure that you have all the right supplies. You also need to prep up your tools. Also, clean the rollers and brushes so that it can paint properly. You also need to ensure that you remove all the furniture from the room and cover the floor with drop cloths. You also need to tape off the floorboards, corners, and other outlet covers and switches. Keep a rag handy in case of spills. You can first sand the walls and prime them before putting on the paint coats.


How color affects your baby

 While a newborn may be unaware of the color of his or her nursery, this will most likely be your child’s room for the next several years, transitioning from infancy to childhood. Project Nursery has an informative guide on the emotional effect that colors evoke. Of course, it isn’t a good idea to use wall-to-wall red, but it can work as an accent color. The article provides a thoughtful analysis of the major colors and their suitability for a nursery.

With so much to prepare for in anticipation of your new arrival, you may not have the time (or inclination) to do the job yourself. The Paint Manager has an experienced team of painters ready to create the perfect nursery.

Contact us to learn more!

Hire a Handyman This Year! Here Are The Advantages!

Hire a Handyman This Year! Here Are The Advantages!


Why You Should Hire a Handyman

Home maintenance is an ongoing obligation. No matter what the season, some area of your home’s interior or exterior will need attention during the year. Many of these tasks fall under the category of “odd jobs” – that is, not major enough to require a home repair or home renovation contractor, but still require a certain amount of time, expertise and physical ability to perform. Then, there’s the infamous “honey-do” list of small projects that seems to keep getting longer. Hiring a handyman can be the ideal solution for those lacking DIY skills and/or would rather not engage in manual labor on weekends.

Advantages of hiring a handyman

Enlisting the services of a handyman is practical for many reasons. As Get Local Home Pros points out, a handyman has a variety of skills, tools and equipment to complete different tasks. According to the article:

“Just because you have several home repairs it doesn’t mean they’re all related skill-wise. Most people don’t have a full set of tools ready to go to tackle every job that arises, let alone the skill to handle them.

Handyman Service, Orlando Home Repair Company, How to hire a handyman

 “The advantage to hiring a handyman is they are skilled in multiple tasks and can handle a variety of home repairs easily. They have all their own tools too. If you’ve got a list of repairs that cover a wide range, like touching up paint, caulking or replacing shingles, handymen are ideal.”

In addition, the article points out that a handyman can save you money by performing multiple home repair or maintenance jobs at his (or her) hourly rate, as opposed to having to hire a different tradesperson for each project. Depending upon the size and complexity of the jobs, a handyman may be able to knock out your entire honey-do list in one day – again, as opposed to having to schedule individual tradespeople at various times during the week.

If you’ve ever performed an exterior or interior home improvement/repair/etc. project, you also learned that after the main job is done, there’s the second job: cleanup. A handyman takes care of this, as well, picking up and disposing of all debris.

Giving yourself the gift of time

Even though you will probably need to be at home to supervise the handyman or provide direction if an unforeseen complication occurs, hiring a handyman frees you from spending the time and effort on the job itself. Binge-watch your favorite series, spend quality time with your kids or whatever you’d rather be doing than what you hired the handyman for. You won’t be climbing a ladder, lugging supplies around or making an emergency run to your home improvement center because you need more paint.

Freshen up your curb appeal

How to Improve Your Home's Curb Appeal, Yard of the Month, Landscaping Tips, Home Improvements

 Whether you’re planning to sell your house, or just want to freshen its look, a handyman can do the jobs that will make it the neighborhood gem. Improving your home’s curb appeal can increase its resale value, allowing you to get top dollar. A new exterior paint job, shutter repair and other such fixes are all in a good handyman’s wheelhouse.


Make sure the job is done right, and safely

A professional handyman uses the right personal protective equipment (PPE) and clothing for the job – such as safety goggles, work boots and heavy-duty gloves. The items that non-professionals tend to buy may not provide adequate protection for work conditions. A good handyman also knows how to handle and properly dispose of hazardous chemicals, as well as hold any required certifications for doing so.

When DIY becomes DDIY (don’t do-it-yourself)

Sure, you may think that anyone should be able to do some types of home repairs or simple maintenance.

But there are certain circumstances and stages of life when hiring a handyman is preferable.

Senior citizens – For those of mature years, the ‘round-the-house jobs you may have once done easily could now be too demanding – or downright risky – to take on. Be honest with yourself about your physical capabilities. Hiring a handyman for jobs that require climbing a ladder or lifting large, heavy objects may prevent serious injury, a medical emergency – or worse.

But YouTube made it look easy – The prevalence of DIY videos on YouTube can give false encouragement to inexperienced homeowners in their ability to tackle an odd job. Those guys and gals wielding power tools make it look easy, but they’ve had plenty of practice. If you haven’t – again, be honest with yourself. Even if you’re a young whippersnapper, it’s better to leave it to the pros. And young whippersnappers can still be shaky on a ladder. You don’t want to learn this fact for the first time while trying to fix a shingle on your roof.

Botching what you initially believed to be a simple project can cost extra money and time in hiring an expert to set things right – not to mention perhaps making the problem even worse or creating one that didn’t previously exist. If you are interested in acquiring DIY skills, home improvement centers offer free workshops that teach the basics in a wide variety of projects. Visit your local store’s website for class schedules.


What kind of jobs does a handyman do?

So what kind of jobs are best for hiring a handyman?

The full list we offer can be found here, including the following highlights:

The Paint Manager is a one-stop resource for hiring Central Florida’s most experienced and skilled professionals. Our satisfied customers can vouch for our reliability, efficiency and trustworthiness. Contact us to learn more and schedule a top-quality handyman for your next project.

When to Paint the Exterior of Your House

When to Paint the Exterior of Your House

Painting your home’s exterior is perhaps the maintenance project that homeowners dread the most. Whether you choose to do it yourself or hire a professional, the task is expensive and nerve-wracking. If you’re like us here at The Paint Manager, you’re economy-minded, and consider any home improvement investment over $100 expensive. And although we pride ourselves on doing our jobs as quietly as possible, having people working on your property isn’t relaxing even under the best circumstances.


In Central Florida, the additional factors of intense heat punctuated by afternoon thunderstorms in the summer and hurricane season through November 1 compound the problem of finding a window of opportunity to accomplish this mission.


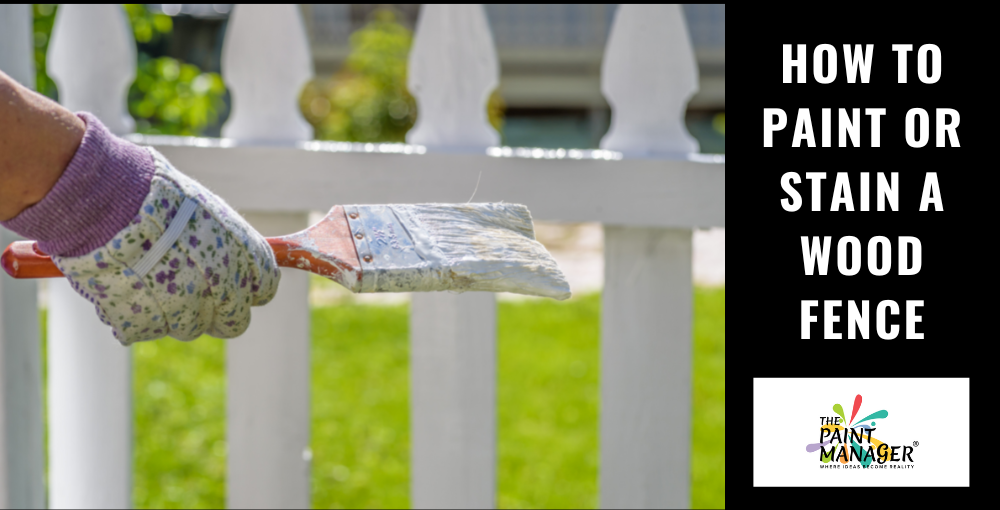
But first, let’s consider your motivation for painting your house. If you’re planning to sell, giving the exterior a fresh coat of paint is a sure way to boost curb appeal. This can also be the ideal time to update the colors to attract more interest among potential buyers. As with everything else, exterior colors go in and out of style – which means you want your house to look as up-to-date as possible. A newly painted house also creates the impression that the rest of the place has been regularly maintained and kept in good repair – and is therefore unlikely to present the new owners with nasty surprises.


If you’re planning to stay, this can still be a good opportunity to give your house an exterior makeover with an updated color scheme. However, your motive may be more than to create an impression – that is, you are regularly maintaining your home. Indicators that it’s time to repaint include:


  • Flaking, bubbling or cracking paint – These conditions often signal dry rot, wet rot or mold caused by failed weatherproofing. Strong sunlight, extreme humidity, storms, blowing sand and ocean breezes can contribute to the damage.


  • Hardened caulk – Caulking eventually loses its ability to expand and contract with your house. If the beads are hard and resistant when you press down, it’s time to recaulk – which typically means it’s also time to repaint.


  • Fading paint – Perhaps the most obvious sign. Sun bleaching is common, and dark hues tend to fade faster than paler shades. However, according to Nationwide, fading on shady sides of the house indicates problems with the vapor barrier or with water intrusion. Look for stains dripping downward on the paint. If water-soluble materials designed for home interiors end up outside the house, it’s a sign of water leaks. If you can’t pinpoint the source, call an expert.


  • Morphing paint color – Did your home’s color morph from sedate beige to pink? Blame ultraviolet (UV) rays, which can sometimes transform paint to an unexpected or undesired shade. To prevent this, make sure the paint is an exterior grade that can withstand UV effects.


  • Patching stucco – Stucco exteriors were popular in Florida in the 1990s, but fell out of fashion due to problems with the material adhering to the concrete block it was applied over. To minimize costs without re-stuccoing the entire house, patch stucco cracks and repaint the whole house. Otherwise, homeowners will be left with streaks or a patchwork from paint that doesn’t quite match.


The quality of the paint and painting materials you choose makes a significant difference in the durability of your exterior paint. Selecting high-quality paints and painting materials will ensure that your paint job lasts longer. Equally important is performing detailed prep work, should you decide to go the DIY route. Clean and sand the surface so paint adheres to it properly. Apply two coats for greater durability and longer useful life.


Now comes the question: How often should your paint your house? Assuming you don’t wait for it to acquire a weather-beaten appearance, the answer is: It depends on some variables – your region, climate and weather conditions, your home’s construction materials and the quality of those materials.


For example, houses with wood siding may require a repaint every three to seven years; every four years if it is stained. Other time frames are:


  • Stucco – 5 to 6 years
  • Brick – 15 to 20 years if painted; occasional pressure washing if not
  • Cement fiberboard siding – 10 to 15 years


If you are planning to have your home exteriors (and interiors) painted, and you need a professional home painting contractor, get in touch with The Paint Manager. Select the perfect color from our color picker page, or contact us for innovative house painting ideas!

Why You Should Hire a Professional Landscaper to Trim Your Shrubs

Why You Should Hire a Professional Landscaper to Trim Your Shrubs

Your front yard is vital in creating the first impression people get about how well you keep up your home. However, yard maintenance is not an easy task. Case in point: trimming shrubs. Depending upon the size of your property, your schedule and your physical capability, hiring a professional yard or lawn service can be the best approach to keeping shrubs and hedges well-groomed, healthy assets to your home’s curb appeal.

In addition to creating an attractive appearance, there are practical reasons to make sure shrubbery is in good shape, so to speak. Trimming is important to the plant’s health, ensuring it gets enough sun and encouraging growth. Trimming is different from pruning, which is done to eliminate dead, broken and infected parts of the plant. Pruning shrubs regularly helps promote healthier shrubs that produce more blooms.

If your landscaping is new, it’s much better to start pruning shrubs when they are young, then do minor annual pruning. If you allow them to become overgrown, they’ll end up needing major renewal pruning, which – assuming you hire a service – will be even more expensive. Black + Decker’s website provides an informative guide to shrub trimming. (For the adventurous, there’s even info on “How to Make a Topiary.”) Despite being written for the do-it-yourself, the article includes helpful basics that everyone should know. For those who may be entertaining the thought of going the DIY route, learning about the specialized equipment involved may tip you toward hiring a service.

Hiring a Yard Service Versus DIY

There is great deal of difference between a professional approach and the DIY way of doing things – unless, of course, you are qualified enough for the job and own the right equipment. In making a list of the advantages of hiring a yard or lawn service, equipment is a good place to start.

Equipment

Yard and lawn care services have all of the proper tools and equipment to do an expert job in trimming and shaping shrubs. In the hands of an experienced landscaper, these specialized pruning tools, saws and power trimmers create a uniform, beautiful effect for the perfect manicured yard. A professional service regularly maintains its tools, keeping them in good working condition, and stores them appropriately.

Physical Labor

There’s no getting around the fact that yard work is hard work. Even lightweight hedge trimmers are heavy and unwieldy, requiring a great deal of physical effort to use. Florida’s triple-digit summer temperatures make the job especially hazardous, necessitating performing it in the early morning or early evening for those insisting on the DIY route. Overexertion leading to illness, heat exhaustion or heat stroke are possible health hazards. Also, the more birthdays we celebrate, the more mindful we need to be about not overestimating our stamina and assuming we can still do what we once did easily in previous years.

Safety

Professional landscapers are trained to do their job safely. For those who don’t do so on a regular basis, climbing a ladder to reach the top of a hedge, wielding a power trimmer or using a small curved saw can be hazardous. Hiring a yard or lawn service could save you a trip to the ER.

Clean-up

A professional yard or lawn service may include clean-up of plant debris in the price of trimming. Be sure to discuss waste removal before hiring a service. Also ask if the service will remove the bags of debris, or if they will be left curbside for yard waste collection day. Some municipalities charge extra for bags of lawn waste that exceed the permitted limit, so check your local regulations first.

Peace of mind

When you hire a professional yard or lawn service, you can spend quality time with your family and friends instead of spending time on landscape maintenance!

The Paint Manager is well-experienced in such yard maintenance jobs as shrub trimming, and has been serving Central Florida homeowners since 2000. Contact us today to learn how we can make your yard an inviting place of beauty for your family and friends.

4 Reasons Why You Need Professionals For Drywall Repair

4 Reasons Why You Need Professionals For Drywall Repair

DIY Drywall, Good Idea or Not?


We all want to live in a beautiful, clean and green home. But, it requires quite an effort on the part of the homeowner to maintain a house that is striking, beautiful, clean, and which is full of greenery. A feat difficult to achieve, homeowners constantly have to strive hard to create and maintain a perfect home.

As a homeowner, you don’t only have to ensure that your home exteriors look beautiful, but you also have to make sure that the interiors, landscape, driveway, pool, and everything else in your house remains in perfect order. A lot goes into creating a home that is beautiful to look at, and a delight to stay in. From a well painted exterior, a nicely maintained landscape, and a perfect pool setting to stylish furniture, attractive paint on the walls, and more, you have to plan everything to perfection.

Integral parts of your home, walls and ceilings, play an important role in making your house look beautiful. And, when the interiors of your home have drywall ceilings and walls, it looks even better.  But, like everything else, even drywall doesn’t last forever. It requires regular upkeep, and at times replacement, when damaged beyond repair.

Though, more often than not, repairing is all it takes to give your drywall a perfect finish. Needless to say, without proper paint and finish on your walls and ceilings, your home interiors can’t look elegant. And, when the wall itself is not in perfect shape, then no amount of paint, good or bad, can produce the looks that are flawless. With drywall, you get a perfect finish, and then the paint on these walls look great.

Leave Your Drywall Repairs to the Professionals 

There are some home jobs that you as a homeowner can do on your own, but you just can’t repair everything in your house. But, there are some homeowners who think they can fix anything and everything that needs repair in their home. It is true that internet helps you learn a lot of things, be it fixing, or repairing a door knob, or changing your sink faucet, but there are some home jobs that are best left to professionals. And, repairing drywall is one such work, which should only be left for professionals to do.

Drywalls are building materials used as a substitute for wooden or concrete walls, which are not just inexpensive, but it also gives a wonderful finish. The only flip side to this is that drywall is softer in comparison to concrete or wooden walls, and therefore they are more prone to damages if proper care is not taken. Of course, when you have damaged walls at home, you need to get it repaired, or else it can spoil the beauty of your house.

When you watch videos online of people teaching you how to repair your drywall, you are bound to think that it’s an easy job and a perfect DIY project, but we tend to forget that the precision it requires (in repairing) calls for professional help.

Moreover, trying to fix a drywall yourself you might end up making the repair work even costlier, as the damaged area can increase further, which would then escalate your total cost. Hence, whenever you need your drywall to be repaired, it is advisable to call in experts.

4 specific reasons why you should call in professionals for drywall repairThe number one reason why you should call in experts if you have a damaged drywall is to maintain the peace of your house. Yes, any DIY project creates some amount of stress in the house. But, on a more serious note, here are 4 specific reasons why you should call in professionals for drywall repair.

  1. They (read professionals) know their job wellAn expert drywall repairing company, apart from knowing their job well, also realizes the unique needs of each of its customer, and therefore presents to you a customized solution. Drywall repair professionals have been through it all and seen every kind of damage your drywall would ever experience. They know what exactly needs to be done to fix the problem on your drywall. From estimates to the exact course of action, you have everything in black and white in front of you, which makes it easy for you to take a call whether to repair or replace the drywall.
  1. They have loads of experience and expertise – There is no substitute to experience, and with it comes the exposure and expertise of repairing the drywall, no matter how bad the damage is. DIY enthusiasts, or individuals and companies who don’t have sufficient experience and expertise of repairing the drywall could spoil your project and increase its total cost, whereas professionals do their job to perfection.
  1. It saves your precious time – Time, they say, is money, and you of course don’t have enough of it to waste. A project which professionals would be able to finish in a couple of hours, people with less, or no experience will do the same work in a couple of days. In today’s fast paced world, you don’t have that much of time to waste, do you? It therefore makes no sense to waste your precious time, instead it is better to save it and utilize the same in other productive work. Hence hiring professionals to repair your dry wall will save you time.
  1. They have the right equipment – Being in a different profession, it is highly unlikely that you would have all the tools that are required for drywall repair. When you hire professionals, one thing that you can be assured of is the latest equipment for the repair job of your drywall. Needless to say, you can spoil your wall further if you don’t have the requisite equipment. Moreover, just by having the right equipment does not guarantee that the job you do on your own will have great results because you should also have proper practice of operating these tools. And, when you hire professionals, not do they have the right equipment, they also know how to use it, which produces better results.


Apart from the reasons mentioned above, you also run the risk of injury and harm to your health, when you plan to repair the drywall on your own. Whereas, when you hire professionals, they not only know how to avoid injuries, but they also take necessary precautions that are required during the process of drywall repair.

Over and above this there is a huge difference in the quality of repair work done when you do it on your own, and the drywall repair that is undertaken by professionals.

If you are in and around Greater Central Florida and drywall repair is what you are looking at, don’t take chances of doing it yourself. Just get in touch with The Paint Manager, paint and drywall experts, and leave your worries to the professionals.

We have been in this industry for long to know the nuances of the trade, and know exactly what it takes to repair any kind of drywall.

We also have all the right tools and trained manpower who know how to use them efficiently, which ultimately gives your drywall a perfect finish.

Go Top
Skip to toolbar